You will need
- Adobe Photoshop arbitrary obrazenia
Instruction
1
Install the software on your computer of Adobe Photoshop and start it. Open the image you want to work with the shortcut keys Ctrl+O.

2
Open the menu "Select > Color range" (Select > Color Range). In the window that appears click on the color that you want to select. Move the indicator from side to side until you are allocated only the required area. Click OK.

3
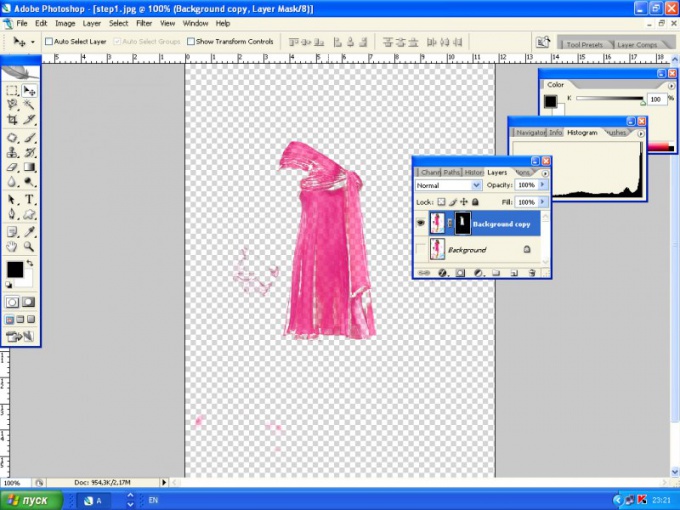
Make a copy of the layer (Create a new layer) and create a vector mask (Add vector mask). It is necessary to separate the selected part from the rest of the image. All changes done with a mask, if desired, be easily removed, the main picture is not affected.

4
Make black-and-white bottom layer. This will not only make the photo and two-tone, but also improve its quality. Apply to image Desaturate (Image > Adjustments > Desaturate or Shift+Ctrl+U) and move the mode Lab Colors (Image Mode > Lab colors). Make a copy of the picture and use a filter Highpass Filter (Filter > Other > Highpass). After this manipulation will increase the contrast and sharpness of the edges. Characteristics of the filter set by trial.After using the filter, apply a layer to Hard Light (Layer Blending Modes > Hard Light) and set the opacity to 30-40%. The bottom layer, without a filter, treat the filter used curves (Image > Adjustment > Curves or Ctrl+M). Values 255-210.Put the image in RGB and do the mixing layers. The image was sharper and brighter.
5
To the bottom layer, which is more contrast, apply a black and white gradient Image > Adjustments > Gradient Map. In the layer mask you can erase with the Eraser tool (Eraser Tool), if you have allocated something is not scheduled. As a result, the selection of color on black and white background will be flawless.
Note
The more similar shades, the harder the task of color selection in the "Select > Color range" (Select > Color Range).
Useful advice
During the application of Hard Light (Layer Blending Modes > Hard Light) with transparency you can experiment.

