You will need
- - computer with Windows 7.
Instruction
1
Before you start to configure the microphoneand you have to make sure that all the necessary sound drivers are installed on your system. Otherwise, the microphone simply will not work.
2
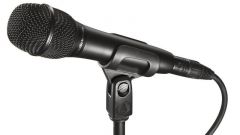
The MIC connects to the Jack located on the rear panel of the computer. On some system units this kind of nest can also be located on the front wall. However, it may not always be working because that is simply not plugged into the computer motherboard. So if after connecting the microphoneand the front panel the system does not recognize, it is best to connect the device to the connector, which is located on the rear panel of the system unit.
3
Once the microphone is connected, click "start" and select "control Panel". In control panel click on "Sound".
4
A window will appear configure the sound equipment. In this window, select the "Recording" tab. Then go to the tab "Levels". Pull the slider from the original position to the right. You can leave the slider somewhere in the middle of the strip. Also in the "Record" if necessary, you can configure other operating parameters of the microphone.
5
Then you need to configure the microphone is directly in the Skype program. If you have not yet installed this program, it should download and install on your computer. Also, you must have your own Skype account. Start Skype program and login to your account.
6
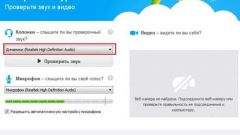
On the toolbar, select "Calls", then go to "sound settings". In the "Microphone" should display the microphonethat you have connected to your computer. You can configure the settings of this device.
7
After selecting all the settings if necessary, you can test your microphone. To do this in the program menu and select "Make test call" and test the settings of the device.