You will need
- grinding machine;
- - sanding paper abrasive Р220-240 and Р120;
- white-spirit or solvent;
- - rough and finish plaster;
- black developing powder;
- - rust Converter;
- wooden and rubber spatulas;
- - masking tape
Instruction
1
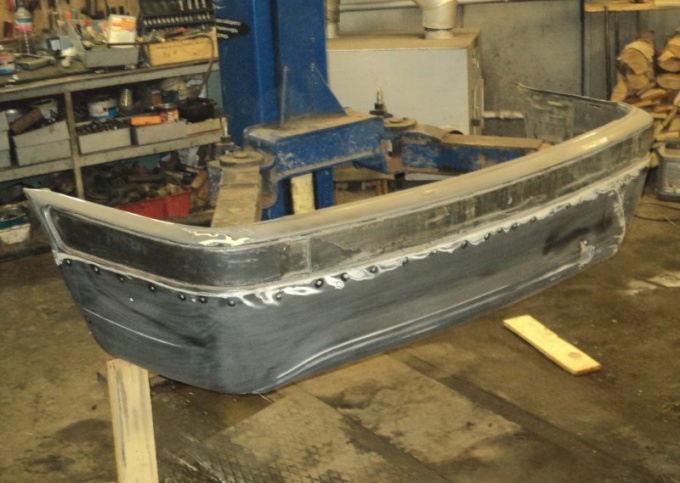
To determine the nature of the damage repaired surface, thoroughly wash the bumper. Degrease with white spirit and solvent. This will open the full picture of upcoming work. Note that under a small defect of the bumper can be more serious or more numerous minor defects. Will help to eliminate them quality plaster and painting.
2
Remove all defects from the surface. To do this, handle the entire repaired surface with an abrasive Р220-240 using sander. In difficult to machine areas need work manually. After that, all the defects manifest themselves, and become more visible.
3
The sharp edges of the chipped paint and rust grind to obtain a smooth surface. The remaining traces of corrosion remove the rust Converter according to the instructions on the bottle. Don't be afraid when grinding to remove excess material layers. In this case, use sandpaper abrasive Р120, that is krupnopanelnoye. This ensures the best adhesion of the putty to the surface. Similarly sand the minor scratches and chips.
4
After surface preparation, go directly to the skim coat. Rough two-component putty with a filler of fiberglass use for deep dents (15-20 mm). The same filler, but a filler of aluminum use as a primary layer for filling deep dents. Universal two-component putty, select for removing shallow dents and irregularities. Two-component finishing putty apply putty on top of the coarse for a more accurate alignment. Single-component finish – to fill macrocarpon and asperities and final filling as a second layer.
5
Gross knead the putty with the hardener, thoroughly stirring the solution until complete disappearance of the pink streaks. Then take a spatula, scoop them with a small amount of the prepared solution and evenly fill the repair area. Do not press the spatula too hard – quite light pressure. Do not try to perform the entire procedure in one go. After applying one coat, wait 15 minutes and apply the next one. Usually use 3-4 layers, gradually filling the defect with putty.
6
After that, treat the repair area with the abrasive paper with abrasive Р120. Try not to get beyond the repair area so as not to cause the emergence of unnecessary scratches. For security purposes, the glue filling the area with tape 2-3 layers. Dried putty before the final filling power trowel black developing powder. This will help to identify defects of rough plastering and eliminate them in the final part of the work. If when grinding formed gaps, fill them with putty.
7
In the same way, apply finishing putty, paying special attention to suspicious sites and places identified developing powder. After drying, Polish the surface with an abrasive Р220-240 to overwrite large risks. Smoothly grind all transitions. Treat the entire area developing powder and apply a second coat of the finishing putty with a rubber spatula. Immediately before painting, degrease the surface.