Instruction
1
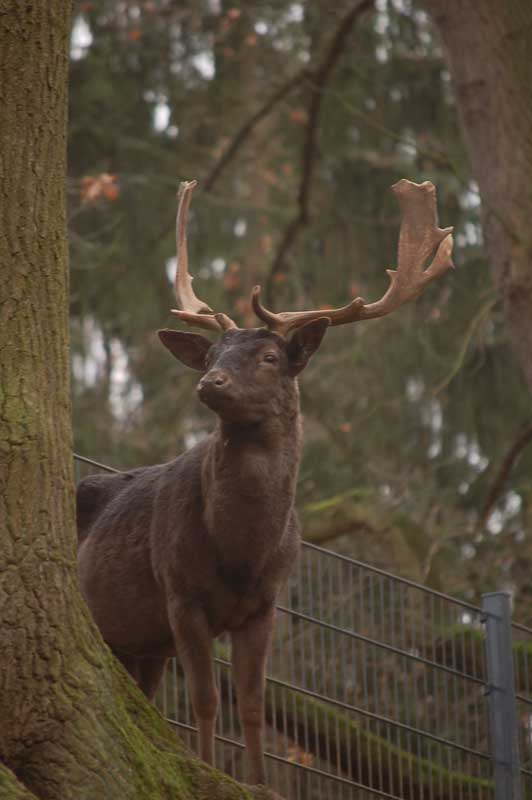
Let's take a random photo. For example, here it is.
2
Improving the quality of pictures always starts with a detailed analysis. As we can see, this photo is pale, dark, it lacks the sharpness, the little details, caught in the frame, distracting the viewer's eye from the animal. For a start, cut off the unwanted part of the frame. The Crop tool located on the toolbar between the paintbrush and the eyedropper. Hold down the right mouse button and form a frame at their discretion.
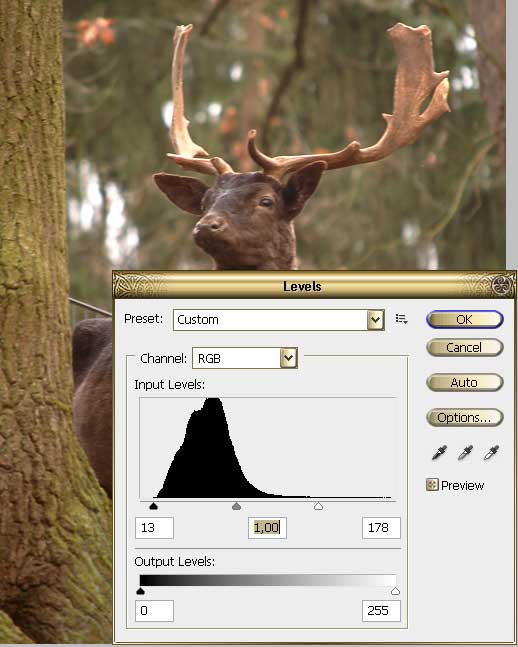
The next step click on the menu at Image – Adjustmens – Levels. You will have the control window levels. As you can see, the histogram is strongly shifted to the left, which explains the total nedoskazannosti picture. Slide the sliders under the histogram so that they reach the edges. It will look something like this.
The next step click on the menu at Image – Adjustmens – Levels. You will have the control window levels. As you can see, the histogram is strongly shifted to the left, which explains the total nedoskazannosti picture. Slide the sliders under the histogram so that they reach the edges. It will look something like this.
3
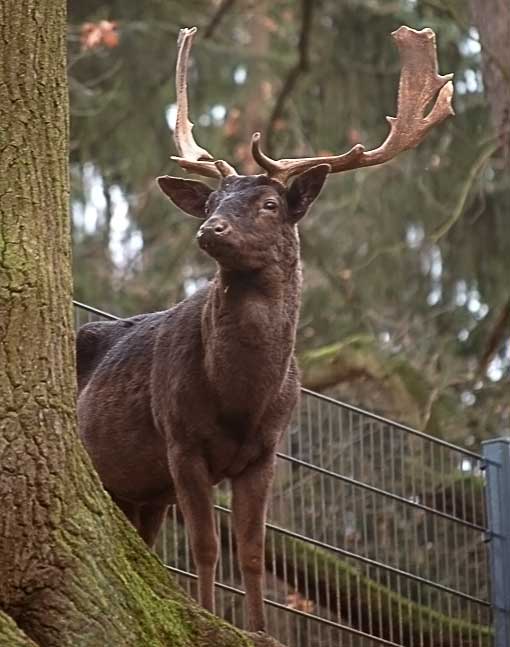
You will immediately notice how much brighter was the your the. But it lacks sharpness. Copy the layer by clicking Layer – Duplicate Layer. To the top layer apply filter – Other – High Pass. Its parameters are set so that the gray picture is slightly discern the contours of the image. Click OK, change the layer blend mode Overlay. Right click the mouse on the top layer in the palette, Megre Down.
4
Overall, the picture became noticeably better, but it too is brown-green. Go to menu Image – Adjustmens – Photo Filter. For this picture more appropriate Cooling Filter, he trimmed the colors, made the picture harmonious.
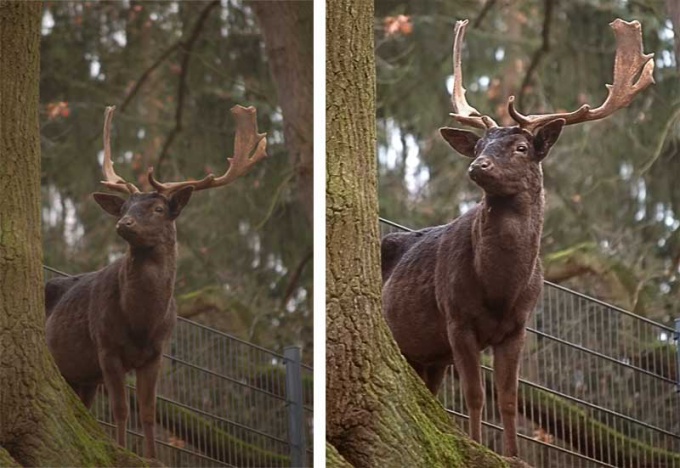
Look at the pictures "before" and "after". Overall photo better. You can of course still work on him, to muffle the distracting highlights in the background, when using the clone tool to retouch the mesh of the fence, maybe slightly blur the bark of the tree in the foreground. Photo processing has never taken a single algorithm to each photo requires individual approach, over time you will learn how to determine what processing needs of a particular shot. Skill will come to you with experience.
Look at the pictures "before" and "after". Overall photo better. You can of course still work on him, to muffle the distracting highlights in the background, when using the clone tool to retouch the mesh of the fence, maybe slightly blur the bark of the tree in the foreground. Photo processing has never taken a single algorithm to each photo requires individual approach, over time you will learn how to determine what processing needs of a particular shot. Skill will come to you with experience.