You will need
- Sheet steel, metallicheski area, castles, drawing, angle grinder, bolts, file, welding machine
Instruction
1
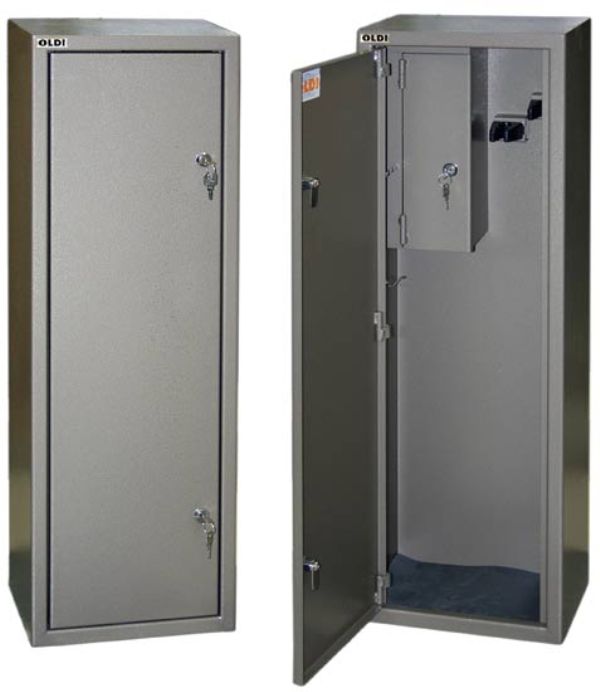
First determine the required dimensions of the safe. Its height will be determined by the dimensions of the weapon, because not every sample can be disassembled for storage. Universal safe, suitable for most long arms, shall not be less than 1300 mm in height. The width and depth of storage should allow to keep him as a weapon with mounted optical sight, which can have a sufficiently high brackets. The width of the safe will depend on the number of weapons that you intend to store in it. Optimal depth and width of about 500 mm.
2
Pick up the materials for the manufacture of the safe. The law On weapons States that the thickness of the walls of the metal box must be at least 3 mm. keep in mind that a receptacle for arms and ammunition can be made from other durable materials, for example, of wood lined with metal. The choice is yours. In addition to the sheet metal of the required thickness, you will need the metal corners for the ribs and two castles, as well as metal sheds (three to five pieces, depending on the weight of the door.
3
Cut the piece for the walls, bottom, top and door of the safe. For metal cutting use angle grinders ("grinders").
4
The Assembly box of parts is performed by welding with a minimum value of the current, otherwise the metal can burn through. You should try welding on unnecessary scraps of metal. Assembly start with the rear wall. To do this, put it on a hard surface and weld to the side wall alternately, and then the upper wall. All spot welds should be placed inside the box at a distance of about 100 mm from each other.
5
Cook the basis of the safe, give it stiffness, finished the front part, where it will be mounted in the door area. First weld area to the safe, and then cook it the elements together inside the safe.
6
Pre cut out metal door reinforce to stiffen the area, privaris him first to the door, and then cook part of the area between them. The area will also impede the attempts of the attackers to remove the door on the shed in the locked position. Now drill holes for two locks (as required by law).
7
Proceed to the installation of the door. Sheds weld to the corner through holes for screws. Now finish the installation, privaris the door to the shed.
8
Fabricate a box for ammunition. It is more convenient to implement it as a separate element and then welded inside of the safe through pre-made openings in the rear wall.
9
Ready safe paint and glue leather. To ensure the reliability of storage of the weapon attach the safe to the floor with screws or anchor bolts, using washers.