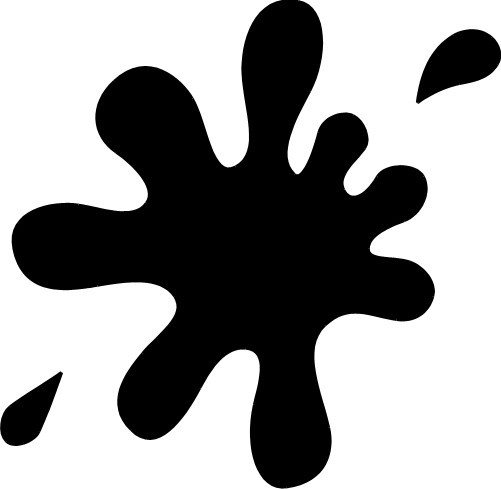
Instruction
1
Create a new document small – 30х300 pixels and fill it with black. Now open the Edit menu and select Define Brush Preset. Creating a new brush in the form of a narrow black rectangle, create another new document 1000x1000 pixels with white background.
2
From the list of brushes, select a brush and set the desired parameters – in the settings check the checkboxes of the tabs Shape Dynamics, Scattering, with a value of 77%, and Smoothing. Diameter brush set at 191, and the parameter Spacing to 356%.
3
In the upper part of created document to draw using the brush created an arbitrary set of vertical bars of different lengths. In the end, you should get a horizontal band of different black stripes.
4
Open the Filter menu and select Distort. Then click on the filter Polar Coordinates>Rectangular to Polar. A horizontal bar will turn into a rounded shape with rays of different lengths.
5
Create a new layer and fill with white color, and then click on the shape layer, holding Ctrl to select it, and merge the layers (Merge Down). From the filters menu, select Gaussian Blur with the desired radius of the blur, which depends on how large you should get a BLOB.
6
Open the Image menu and select Adjustments>Threshold. Move the slider to adjust the shape of the future blots. When the form you want, click OK.
7
Smoothen the edges of the blots, highlighting the white background with the magic wand (Magic Wand tool) and then invert the selection (Ctrl+Shift+I) and select Make Work Path with a value of 0.5-1 pxl. Create a new layer, go to Paths palette and a contour fill with black color. Blot finish.
8
You can add any visual effects to add a shadow, to paint it in any color and use as directed.