You will need
- Tools: Adobe Photoshop 7 or higher
Instruction
1
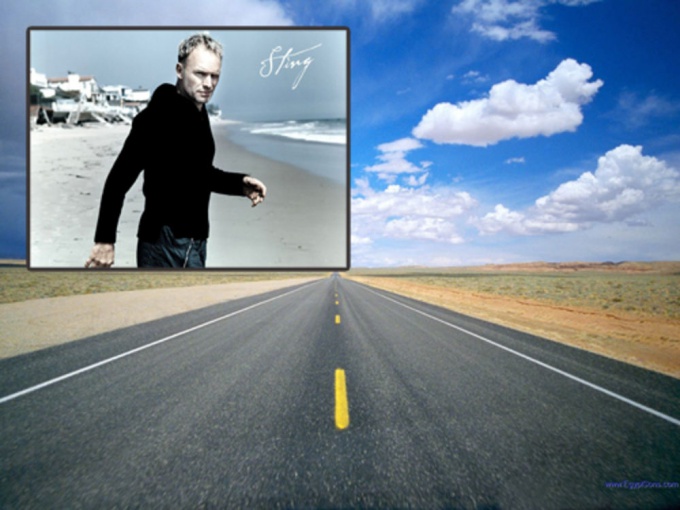
First you have to find a background that you want to see on the pictures. If the background is found, open it and open the original photo. In most graphics and text editors, these documents are opened in the menu "File" you click "Open" (Ctrl+O).
2
Each image will open in a separate window. The last file (the original photo with a person or object) will be active. Click in the menu "Select" – "All" and then in "Edit" – "Copy". Photo in memory – unable to close it.

3
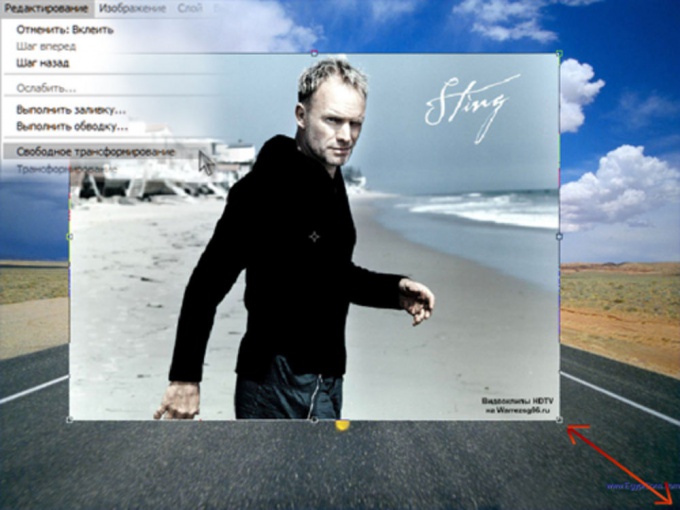
Paste the copied photo into the document. To do this, in top menu select "Edit" and then "Paste". You can use hot keys – Ctrl+V. Now the top layer with the silhouette is located above the layer with the selected background. If the size of the pictures do not match, scroll to the top of the photo ("Select – All") and transform it to the desired size ("Edit" "Free transform"). As a result the top photo completely cover the photo with the background.
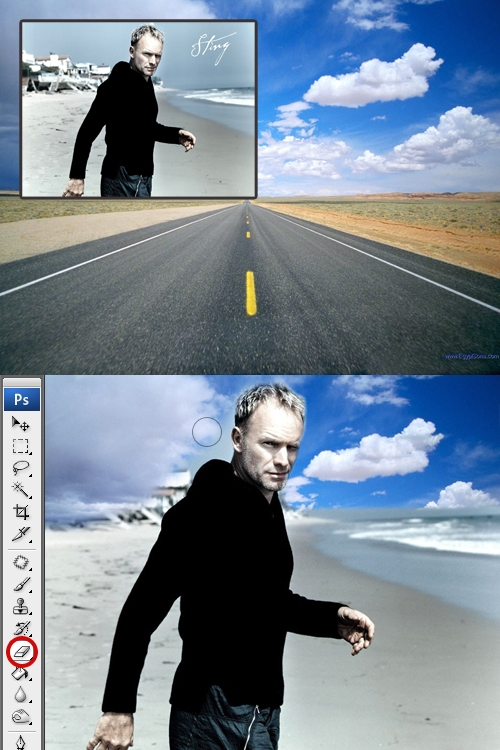
4
Select the eraser, medium size and start to erase the background of the top layer. As erasing the bottom layer will come through the top. When the whole background on the photo on top is removed, you will see a silhouette or object on the new background.
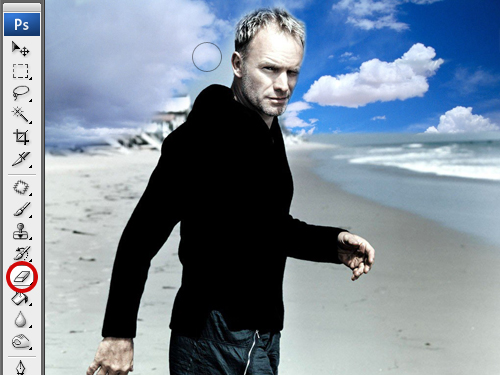
5
Using this technique it is quite easy to replace only part of the background or combine both background. To do this, first adjust the settings of the eraser tool: opacity, and the pressure force must be in the range of 10-15%. Start erasing the background. Now the background will be removed not all at once, but gradually become thinner, more transparent. If both pictures have roughly the same environment-the background (greens, beach and sea, city etc.) you can achieve very interesting results. In the same way, it is possible to connect more than two backgrounds.
Useful advice
Note. To understand the idea of layers in Photoshop, imagine a stack of tracing paper. On each sheet there is a part of the image. The tracing paper is very thin and transparent, allowing you to see the entire image, which is composed of these pieces. Moreover, any sheet can be removed from the stack, independently of the others, or insert a new one.