You will need
- Graphic editor Adobe Photoshop.
Instruction
1
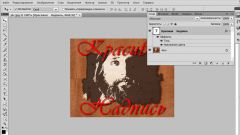
Start Photoshop and load the image in which you want to add the inscription. These two operations can be combined - click, right-click on the picture in a Windows Explorer or on the desktop. In the pop-menu, expand "Open with" and select Adobe Photoshop.
2
Click on the toolbar "Horizontal text or Vertical text" - they are reserved for the icon with the image of the letter "T". This can be done with the keyboard, just press the button with the Russian letter "E" or the Latin T.
3
Click the desired location on the picture and Photoshop will include a text entry mode. Dial inscription, without paying attention to its size, color and font.
4
Turn off edit mode by clicking in the toolbar, for example, the first icon - the "Move" tool. Now you can use "Symbol" to configure the settings made inscriptions. If it's not in the GUI editor, open the menu, section "Window" and select "Symbol".
5
In the upper left drop-down list pane, select the desired headset and placed it beside the list to select the desired font.
6
In the second line of the panel, "Symbol" placed controls, defines the font size and line spacing, and the third responsible for the spacing between letters. Set the desired values for these settings.
7
In the fields that are marked by a symbol composed of the letters "T" and bi-directional arrows (vertical and horizontal), you can specify the proportions of the letters of the inscription. Set the desired values of width and height in percent.
8
Click on the rectangle labelled "Color", expand the palette and select the desired tone of color labels.
9
With the help of tiny buttons at the bottom of the panel, specify any additional changes to font characters of the inscription make their strikethrough, underlined, Superscript, subscript, etc.
10
Save the image with applied inscriptionof Yu. Easiest the save dialog to call by simultaneously pressing the keys Ctrl and S.