You will need
- - warm water
- - detergent
- - soft cloth
- soldering
- - fine-grained sandpaper
- - a few unnecessary pieces of plastic
Instruction
1
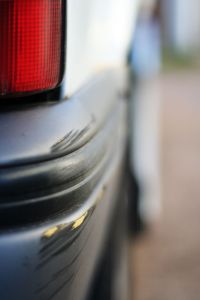
Clean the crack.
Use warm water, soap and cloth to remove the surface of the bumper all the dirt and dust. Wash carefully: this depends largely on how successful the repair will take place. If you wash the bumper like it should be dry.
Use warm water, soap and cloth to remove the surface of the bumper all the dirt and dust. Wash carefully: this depends largely on how successful the repair will take place. If you wash the bumper like it should be dry.
2
Sealed the crack. Highly recommend you first practice on something unnecessary to the inexperience not to ruin your bumper. With a hot tip of a soldering iron melt the edges of two pieces of plastic and join them together firmly to each other. Try to melt as little material as possible, otherwise the joint will be too thick, and the plastic deformed. Do this a couple of times to ensure their ability. As soon as things start to happen, move on to the actual bumper. Work from the edges of the holes towards the centre, not forgetting tightly pressed against each other melted pieces of details. After completing the repair, let the workpiece cool down.
3
Treat the seam. Now you have a pretty long and hard to Polish the surface of the bumper with fine sandpaper. Do not spare time and effort: you don't do this kind of repair every day, and appearance your car deserves the wasted several hours. If the joint still turned out thick and rough, start with sandpaper with a slightly larger grain. As soon as irregularities are smoothed, move up to a smoother sandpaper with fine abrasive layer.
4
The repair of the bumper over.
If necessary, it can be treated with sandpaper over the entire surface, then wash, dry, degrease, cover with a layer or two of primer and paint in the desired color using spray gun or even spray. The choice of materials and tools depends on your budget, patience and skill.
If necessary, it can be treated with sandpaper over the entire surface, then wash, dry, degrease, cover with a layer or two of primer and paint in the desired color using spray gun or even spray. The choice of materials and tools depends on your budget, patience and skill.
Note
Work in a well ventilated area: molten plastic can be very toxic.