Instruction
1
Should not be happy that you bought almost new sleepers.
First, this is illegal - sleepersand in this case had to go for re-laying the road, and not for sale. And therefore, in respect of the purchase may be questions on the part of law enforcement.
Secondly, creosote (impregnation for sleepers), as an antiseptic oil-based, long retains its properties to penetrate through the plaster, putty and other finishing materials.
Finally, the sharp strong smell of creosote for a long time will remind you of the "wrong" purchase.
The right decision is when acquired for the construction of sleeperss used, vintage lot of years now, washed by rain, snow, and creosote has been thoroughly dried by the sun.
2
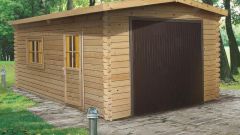
For walls of the houseand used wooden sleepers, you need to make the blank parts of the bond. It staples and metal pins for the connection between a series arranged in a wall of sleepers. Because sleeperss depending on the type vary in size for each row to pick them up one size in height.
When laying the first row on the Foundation, do the waterproofing and lay between sleepersAMI and the insulation layer tow. Ends connection between them perform in the cusp, secure staples and also insulate tow.
Following a number of lay also picking up sleeperss height, aligning them on the internal side of the wall. If the exterior wall surface isn't quite smooth - nothing wrong with that. All defects will be closed with the covering of walls of the house.
Each row and connecting the ends of the sleepers lay a layer of tow.
To secure the stacked series, each of the sleepersat two locations (at a distance of 50-70cm from the ends) drill the hole at 5-10cm went inside of the bottom number. In the resulting hole tightly install metal pins, which provide the strength of the connection of the rows with each other.
3
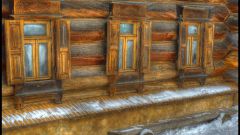
Decide with the location of window openings. The walls between them will also be fastened with metal pins, and in the end - mounted window boxes.
4
Before laying the last row is necessary to provide for the installation of fasteners for binding the truss system. Construct the roof.
5
Now install doors and Windows, make attic floor, lay, not attaching to the joists of the floor boards face down (to less damage in the plaster of the walls).
In the cable box route electrical wiring, collected under the scheme and stucture wall. Floorboards turn face up and sew to the joists.
After carrying out finishing works (painting, whitewashing, etc.). Your house is ready.
In the cable box route electrical wiring, collected under the scheme and stucture wall. Floorboards turn face up and sew to the joists.
After carrying out finishing works (painting, whitewashing, etc.). Your house is ready.
Useful advice
Laying each row you need to check for plumb and level so the wall is smooth and the same height.