Instruction
1
This problem is typical for laptops with SATA hard drives. The business is the fact that, unlike WIndows Vista and 7, version XP does not contain SATA drivers and it just does not see the hard drives. One solution to this problem is the use of BIOS mode.
2
To do this, restart the laptop and use the function key F2 at the time of its inclusion. Next, you need to change the settings for IDE compatibility mode or disable AHCI mode in the settings of the SATA controller. The choice of a particular action depends on the model of laptop. The options are:
- SATA Native Mode - select the Disable;
- AHCI Mode - enter a Disable command;
- SATA Operation - select ATA;
- Configure SATA as - IDE, point;
- SATA Controller Mode - select Compatibility.
This action should lead to the recognition of the hard drive Windows installer version XP.
- SATA Native Mode - select the Disable;
- AHCI Mode - enter a Disable command;
- SATA Operation - select ATA;
- Configure SATA as - IDE, point;
- SATA Controller Mode - select Compatibility.
This action should lead to the recognition of the hard drive Windows installer version XP.
3
If this did not happen, you will need your own OS distribution. To do this, transfer the contents of the boot drive to a separate folder on your computer and download and install the dedicated application nLite. Load special SATA drivers from the official website of the laptop manufacturer or use the generic Intel Matrix Storage Manager.
4
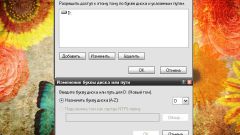
Open the context menu of the executable that is downloaded by click right mouse button and select the command "Create shortcut". Add the parameters
-a-a-p c:drivers
at the end of the line Object created shortcut and confirm the execution of the selected action by pressing the "Apply" button. Start the nLite application b, specify the path to the folder with the setup files of the OS.
-a-a-p c:drivers
at the end of the line Object created shortcut and confirm the execution of the selected action by pressing the "Apply" button. Start the nLite application b, specify the path to the folder with the setup files of the OS.
5
Apply the check boxes in the rows "Bootable ISO" and "Driver". Use the "Add" button to specify the path to the folder with the extracted drivers and select. Confirm select integration and select "Create ISO". Save the image and transfer it to disk.