You will need
- - Photoshop;
- - background image;
- file object to insert.
Instruction
1
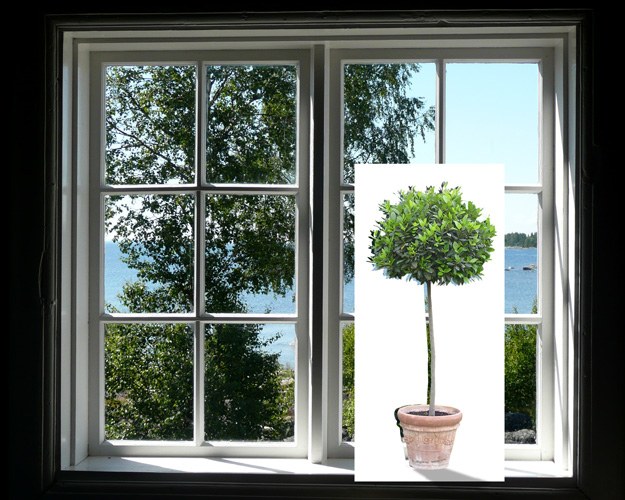
Open the background image in the graphics editor option to Open the File menu. Option Place same menu place the object in the document. If necessary, change its size, sliding frame, by which it is surrounded. To move the object on the background, select the Move tool. If you need to move the inserted picture to a certain number of pixels, use the cursor keys.
2
The image inserted in the document with the option Place is associated with the source file of a smart object. If the picture you put on the background layer needs additional processing such as background removal or color correction, use the Smart Object option from the group menu, Rasterize Layer.
3
To remove from an inserted object to a plain background use the Color Range option from Select menu. Click on the color that you want to remove, and tick the Invert checkbox. To hide the selected area, add a layer mask using the Add layer mask button, which is located in the layer palette.
4
If the background consists of a large number of different shades, turn on the Pen tool in Path mode and draw the object on the edge. Closing the loop, open the context menu, right-click and select Make Selection. If you want to feather the edges of the images, specify the amount of shading in the Feather Radius field. Hide the background by creating a layer mask.
5
The inserted object in the image may require editing in order to bring its color to the background. To do this, create an adjustment layer with Color Balance option group New Adjustment Layer from the Layer menu.
6
To limit the scope of the filter effect of the inserted object, click the layer where it is located, and use the option Load Selection menu Select. To exclude the background from the scope of the adjustment layer you'll need to invert the loaded selection. This is done with the Inverse option in this menu. Click on the mask on the layer with the filter and using the Paint Bucket fill tool with black color selected area.
7
Open the filter settings option Layer Content Options menu Layer and adjust the color of the inserted object to the color schemes background image.
8
In Photoshop document, you can insert the object on a layer in the file open in another window of the graphic editor. To do this highlight the contents of the layer option menu Select All and copy the image Copy option of the Edit menu. Click on the window where you opened the background image and insert the object using the Paste option in this menu.
9
If you want to save a layered file with the inserted object, use the Save As option the File menu and select the psd format. To obtain a single-layer file, save the image in jpg format.