You will need
- - Arduino Pro Mini;
- computer;
- - USBASP-programmer;
- - connecting wires.
Instruction
1
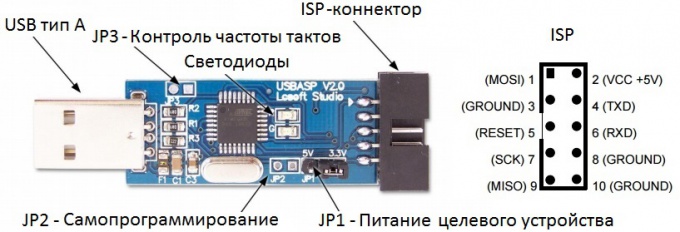
First, a few words about the programmer. You can buy one for $ 2 in any Chinese online store.
Connector type USB-A is used, of course, to connect the programmer to the computer.
The ISP connector is needed to connect to the programmable circuit Board.
The jumper JP1 controls the voltage at the output VCC ISP connector. It can be 3.3 V or 5 V. If the target programmable device has its own power supply, you need to remove the jumper.
Jumper JP2 is used for updating the firmware of the programmer; this article is not considered.
Jumper JP3 is needed if the clock frequency of the target device below 1.5 MHz.
Two LEDs indicate: G - power is supplied to the programmer, R programmer connected to the target device.
2
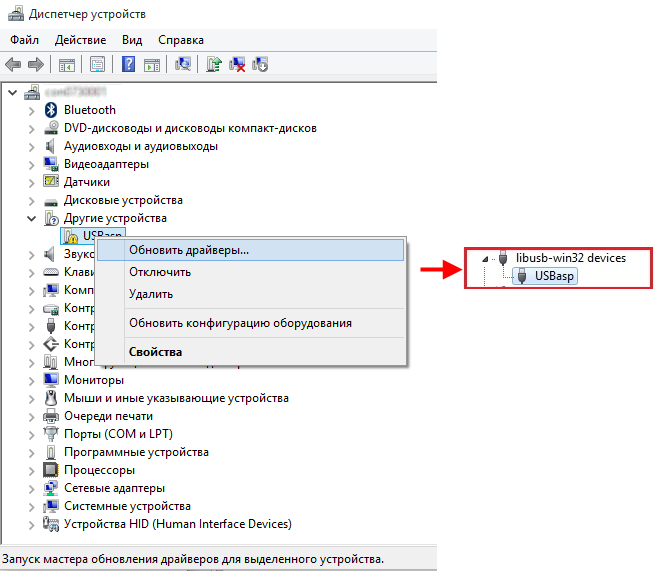
Connect the programmer to the USB port of the computer. Most likely, after a short while, the operating system will report that it failed to find a driver for this device.
In this case, download the driver for the programmer from the official website http://www.fischl.de/usbasp/. Unpack the archive and install the driver in a standard way. In device Manager you should see the USBasp programmer. Now the programmer is ready to work. Disconnect it from the computer.
In this case, download the driver for the programmer from the official website http://www.fischl.de/usbasp/. Unpack the archive and install the driver in a standard way. In device Manager you should see the USBasp programmer. Now the programmer is ready to work. Disconnect it from the computer.
3
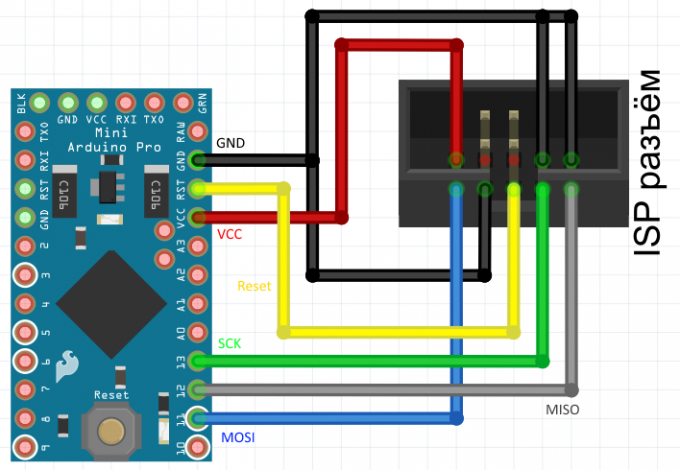
Next you need to connect the charge Arduino Pro Mini with the programmer. The scheme shows how to do it.
4
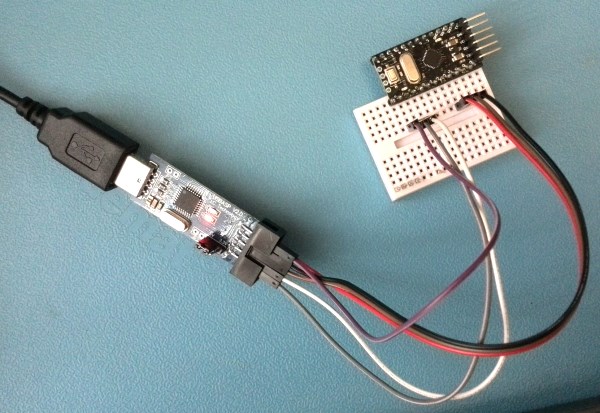
We use development Board and connecting wires - it will be fast and reliable. Connect the connector of the programmer with insights on the Arduino Pro Mini as described above.
5
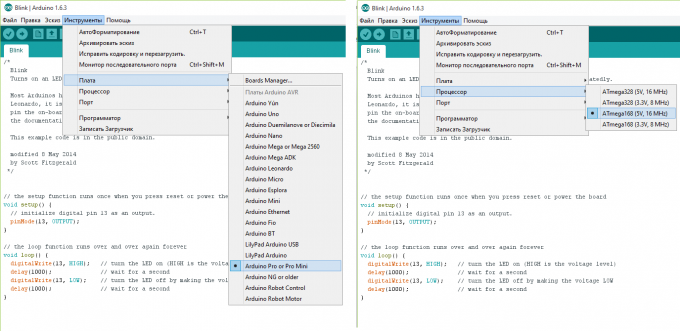
Open the Arduino development environment IDE. Select the desired card through the menu: Tools -> Board -> Arduino Pro or Pro Mini (Tools -> Board -> Arduino Pro or Pro Mini).
You must also select the type of microcontroller, which is set using menu Tools -> Processor. I have is the ATmega 168 (5V, 16 MHz). These options are usually written on the housing of the microcontroller.
You must also select the type of microcontroller, which is set using menu Tools -> Processor. I have is the ATmega 168 (5V, 16 MHz). These options are usually written on the housing of the microcontroller.
6
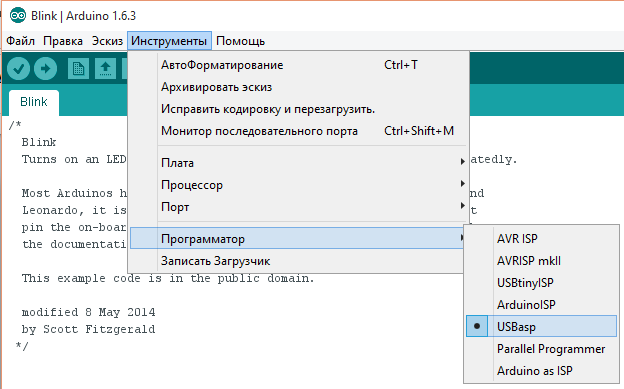
Will select the programmer: Tools -> Programmer -> USBasp (or Tools -> Programmer -> USBasp).
7
Open the sketch you want to load into memory of the microcontroller. For example, let it be the flashing led on: File -> Examples -> 01. Basics -> Blink.
Connect the programmer connected to Arduino Pro Mini to the computer.
Now, in order to load a sketch to Arduino using the programmer, you can proceed in several ways.
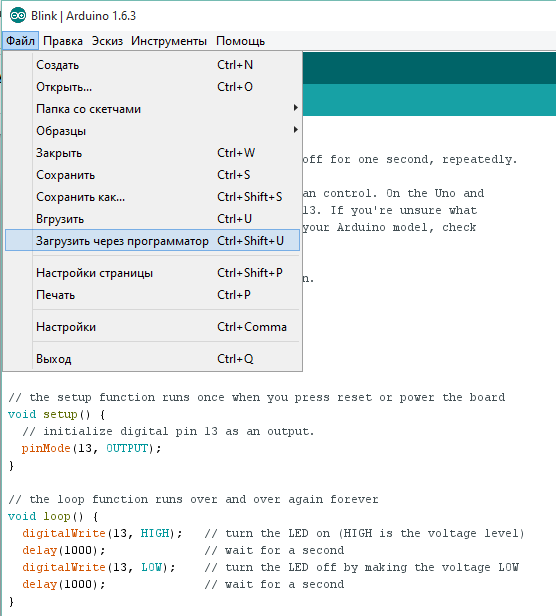
1) Through the menu File -> Upload using programmer;
2) using Ctrl + Shift + U;
3) hold down the Shift key, press the right arrow button, which is normally used to download the sketch in the Arduino memory in a standard way.
All, the program is "flooded" in memory of the microcontroller.
Connect the programmer connected to Arduino Pro Mini to the computer.
Now, in order to load a sketch to Arduino using the programmer, you can proceed in several ways.
1) Through the menu File -> Upload using programmer;
2) using Ctrl + Shift + U;
3) hold down the Shift key, press the right arrow button, which is normally used to download the sketch in the Arduino memory in a standard way.
All, the program is "flooded" in memory of the microcontroller.
Note
Maybe the IDE will give you a warning: "warning: cannot set sck period. please check for usbasp firmware update." Don't panic, the sketch is still recorded in the memory of the microcontroller and it will work.