You will need
- - a sheet of paper;
- pencil.
Instruction
1
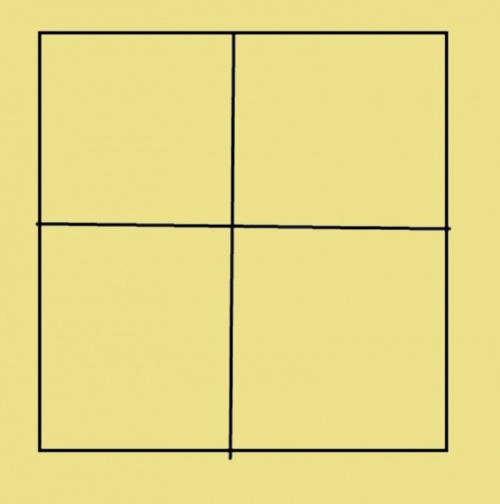
Draw a square. Try to draw it by hand as evenly as possible. Do it better than a finely chiseled solid pencil mark T or even 2T. Auxiliary lines should be barely noticeable. The square is most convenient to draw, putting a sheet of paper directly in front of you without any tilt, short side facing you.

2
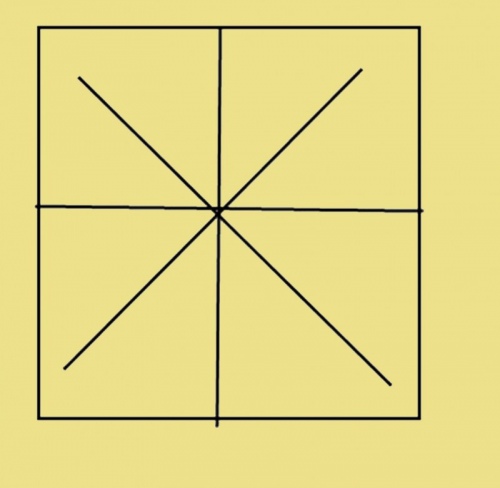
Swipe both diagonals and find the point of intersection. Through it draw the vertical line. Its length is equal to must be equal to the length of the diagonal, and the point of intersection of this axis divides the line in half. Swipe through the center of the drawing a horizontal line exactly the same length as the vertical. You got the 8 rays of the same length.

3
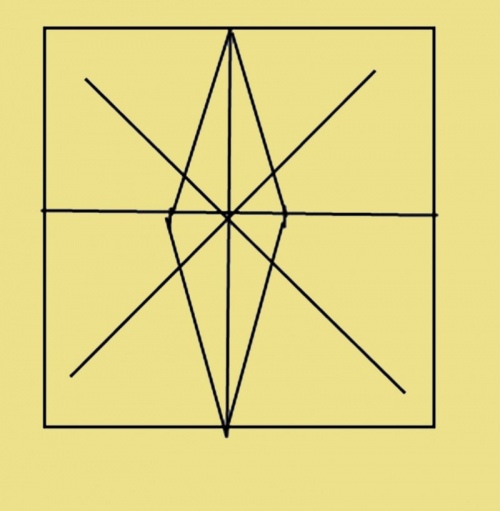
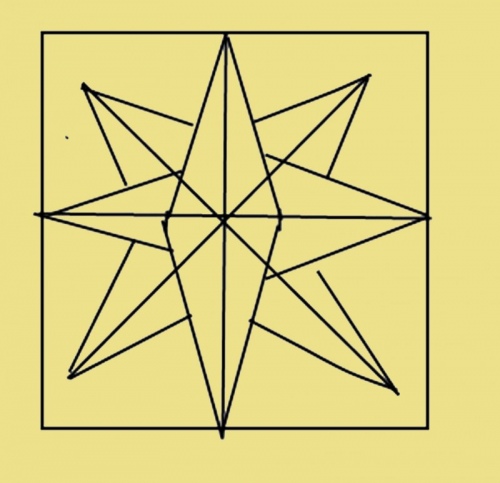
Draw the rays. Start with a vertical line. Imagine that it is the middle of the two beams. You only have to determine the widest part. To do this, start from the intersection points of all lines are the same distance right and left. Connect them to the upper and lower ends of the Central line. Similarly, draw all the other rays.

4
To complete the picture. For example, trace only the outline and remove the excess lines. Trace the silhouette is better than a soft pencil. Paint the inner part. You can make a multi-colored rays. In this case, the auxiliary part lines leave. For example, those in which you drew a Central vertical lozenge. Other contour lines must end at the intersection with the parties. Fill the Central beam of one color and two adjacent another. In the same way and paint the rest of the rays, alternating colors.

Note
On the same principle and draw a 12-pointed star. However, in this case, each quarter of the square is divided not in half, into 3 parts.
Useful advice
In order to cut a star out of colored paper, anything to draw not necessary. Make 2 squares the same size. You can take two sheets of the same color or different. Fold one square diagonally. Then bend it again by aligning existing crease line. The resulting triangle put in front of a loose side down. Mark a point about halfway between the center and the free edge. Starting from the corner cut the workpiece to that point, and then from it to the second corner. Exactly the same with the second square. Put one billet to another and glue them in the middle. The second square can be slightly smaller. It needs to be glued on top.

