You will need
- - Russified version of Adobe Photoshop СЅ5
Instruction
1
Launch Adobe Photoshop and open any image: File > Open > select file > Open.
2
In the lower right corner of the program window, find the "Layers" (if it is not, press F7), select the tab "Layers" and double click on the background. In the window that appears, click "OK". Thus, you turn the background into a layer called "Layer 0". You can give him some more high-sounding name, but in our case it is not so important.
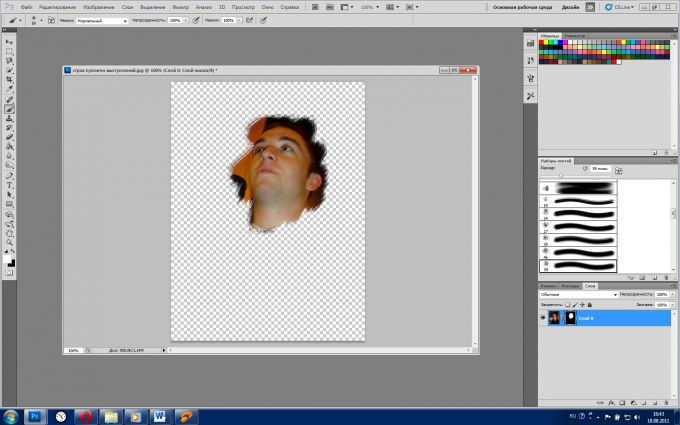
3
Click the "Add layermask"at the bottom of the tab "Layers" and are shown in the form of a square with a circle in the middle. Next to the picture "Layer 0" will appear the emblem of the layer masks in the form of a white rectangle. Switching between the layer and its mask is accomplished with a simple click, and the active item is framed with a small frame.
4
Make sure that you have activated the layer mask and press Ctrl+Backspace. Thus you will fill in the maskthat is currently foreground document, relatively black color, but the workspace will turn the background mesh. If you need to deactivate the mask, click on its logo, right-click and click "Disable layermask".
5
To give the mask a certain form, select the tool "Brush" and paint over the desired area. The fill color defaults to white, but if you choose blue, red, green, etc., it will turn into one of shades of grey, and this, in turn, affect the transparency of the display mask.
6
To make the mask opaque, you can use two tools. The first – brush, but set the fill color to black. Second – Eraser (hotkey E Latin, switching between adjacent tools Shift+E).
7
To keep the fruits of your labor, click "File > Save as > select the path, set the file type to JPEG (if it is the final result) or PSD (if you're going to work on this project) > Save.