You will need
- - ceramic tiles;
- - glue for tiles ("Plitonit-Superquinn", "Skanfixsuper", etc.);
- - tool for plastering (trowel, putty knives, kirochka, and so on);
- - cement;
- - sand;
- - metal brush;
- mesh netting or soft wire Ø1-2 mm;
- - an electric drill;
- - pobeditovye drills.
Instruction
1
Clean oven from clay or cement plaster to the base. This work should be undertaken carefully, on the surface of the bricks should not be clay or cement mortar. Remove the clay from joints to a depth of 5-10 mm. Cleaning of the furnace is convenient to run a wire brush or abrasive wheel mounted on angle grinder.
2
Attach to furnace a metal reinforcement grid. For this hammer in the joints between the bricks nails so that their hats towered above the surface 10-12 mm. you Can drill holes in the body of the bricks and wrap them screws or screws, the diameter of which is slightly larger than the diameter of the holes. Attach nails or screws to the grid "netting". If not, navathe nails wire netting with mesh sizes of 50-60 mm.
3
Stukatura surface of the furnace sand-cement mortar or adhesive. In the first case, use the ratio 1:2,5 or 1:3 (cement:sand). Brand of cement shall be not below M400. The sand must not contain clay and other impurities, it is best to use a clean river. When applying a hot-melt adhesive as a plaster mix should be used in accordance with the instructions, completing all her requirements for the thickness of the layers. Depending on the brand of glue you may need pre-priming of the seams and multi-layered plaster with breaks between application layers. Plaster needs to hide the reinforcement mesh. The surface of the furnace after plastering should be smooth, its angles are vertical.
4
Attach to the wall of the furnace rail wooden rail so that its upper edge was from the floor at a distance not exceeding the width of the tiles. Check its levelness. The purpose of Reiki is to ensure the horizontal rows. If you start laying directly from the floor, in case it bumps all the rows will get also rough.
5
Prepare glue. Pour the mixture into the prepared container, add the required amount of water and stir well. The exact procedure of the preparation adhesive, saving them working qualities, etc. indicated in the instructions. You need to prepare not more than the number that you will be able to use before it loses plasticity. Some require pre-glue is applied to the plaster primers.
6
Laying the tiles start from the "apparent" angle of the furnace from the second row from the bottom (of guide rail). The clutch is simultaneously up and to the side. Apply glue to the wide flat spatula, smoothed it over better gear. The thickness of the glue is regulated by the instruction. To maintain the same gap between the rows you can use the remote crosses, do not forget to remove them before grouting. After lining the entire surface, carefully remove the guide rail and place the bottom row of tiles, performing necessary pruning.
7
Grouting is carried out after some time, it must be specified in the instructions to thermokey. Sometimes before grout takes a few times to heat the stove, not warming her up to high temperatures. Most grout is used with the same adhesive used for gluing tiles. Seams convenient to fill in with a rubber spatula, due to its flexibility. Excess grout removed from the tiles with a damp cloth.
Useful advice
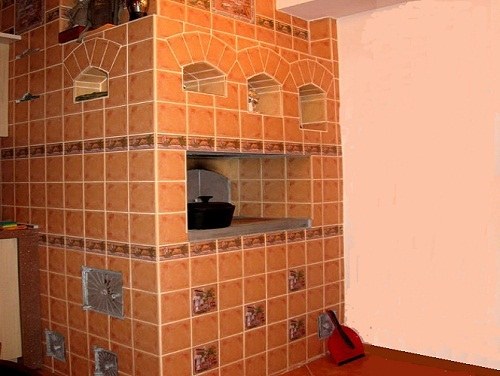
Tile laid on the stove operates in a big temperature range, subjected to repeated heating and cooling. This is what caused the necessity of laying the reinforcing mesh in the plaster layer. If it is laying on the whole surface of the furnace difficult, just an area of the furnace.