Replacement matrix there are a number of reasons: ranging from the annoying appearance of "broken" pixels, ending with the damage from impact or fading color. To replace the display you can own at home, if only to be able to find suitable components.
Full disassembly do not need. Since it is only necessary to replace the display, the notebook, the operation will be conducted only on the lid, without touching the other elements. The laptop screen is framed by a removable frame which is fixed on the plastic latches. In some models around the screen can be screwed screws, closed with rubber plugs that act as shock absorbers for soft closing. Plugs should be removed and the screws unscrewed, adding up all the match box or other suitable box. To remove the frame it is necessary to carefully pry. Better to do it from the broken screen so you don't accidentally scratch the body.
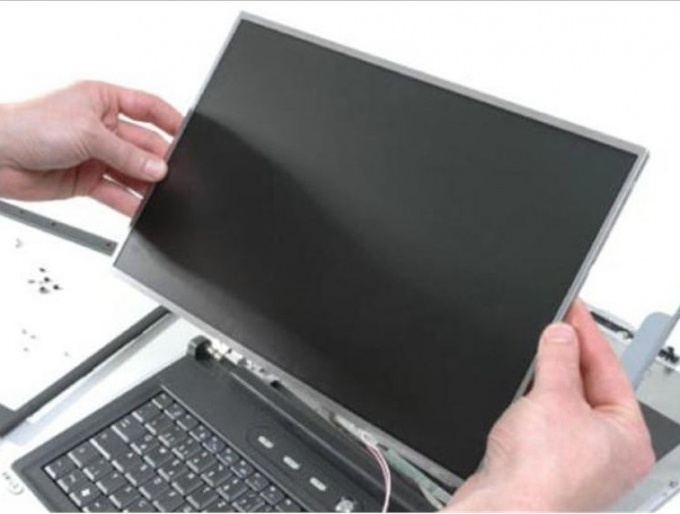
The matrix itself is screwed to the back of the cap. The screws should be unscrewed, and the display remove and put on the keyboard. You must then carefully disconnect the power cable from the display and signal the train. Matrix is fixed in a metal frame, which also must be removed.
Laptops are used in the model matrix, so to find a replacement is not difficult. The screen model can be found at the back of the display. Order screen can be in the appropriate online store, but it is better to look for a seller on the forums of geeks, if there is a need to enter the costs in a modest budget. In favor of buying a used/display says it's low cost and slightly less likely to burn-out pixels because of the factory marriage. The cons of such a purchase are obvious: the development of the resource and lack of warranty.
Before beginning installation it is better to cover the keyboard, knitted fabric or another soft material. Display, to which were bolted the native metal frame, placed on top, face down. The need to carefully connect the ribbon cable using the plastic tongue and install the plug. This step is a verification test on: the screen should be examined for the presence of defects and to evaluate the quality of color. Thereafter, the Assembly is carried out in reverse order: the matrix attached on the back cover of the laptop and set frame frame.
How to disassemble the laptop
Full disassembly do not need. Since it is only necessary to replace the display, the notebook, the operation will be conducted only on the lid, without touching the other elements. The laptop screen is framed by a removable frame which is fixed on the plastic latches. In some models around the screen can be screwed screws, closed with rubber plugs that act as shock absorbers for soft closing. Plugs should be removed and the screws unscrewed, adding up all the match box or other suitable box. To remove the frame it is necessary to carefully pry. Better to do it from the broken screen so you don't accidentally scratch the body.
The matrix itself is screwed to the back of the cap. The screws should be unscrewed, and the display remove and put on the keyboard. You must then carefully disconnect the power cable from the display and signal the train. Matrix is fixed in a metal frame, which also must be removed.
Selection of replacement
Laptops are used in the model matrix, so to find a replacement is not difficult. The screen model can be found at the back of the display. Order screen can be in the appropriate online store, but it is better to look for a seller on the forums of geeks, if there is a need to enter the costs in a modest budget. In favor of buying a used/display says it's low cost and slightly less likely to burn-out pixels because of the factory marriage. The cons of such a purchase are obvious: the development of the resource and lack of warranty.
Installation of new display
Before beginning installation it is better to cover the keyboard, knitted fabric or another soft material. Display, to which were bolted the native metal frame, placed on top, face down. The need to carefully connect the ribbon cable using the plastic tongue and install the plug. This step is a verification test on: the screen should be examined for the presence of defects and to evaluate the quality of color. Thereafter, the Assembly is carried out in reverse order: the matrix attached on the back cover of the laptop and set frame frame.