You will need
- A mattress, a sander or sandpaper, jig saw, tape measure, angle, furniture parts, hammer, nails, planks, plywood, timber, wooden slats.
Instruction
1
Do not use in the work above the crib sheets fibreboard, chipboard and particleboard, which can release toxic substances into the surrounding air child. The safest materials for the manufacture of children's furniture – birch, pine, a little more expensive will cost oak planks and beech. The wooden parts of the crib must be thoroughly sanded with sandpaper or with a grinding machine to got from poorly processed wood splinters.
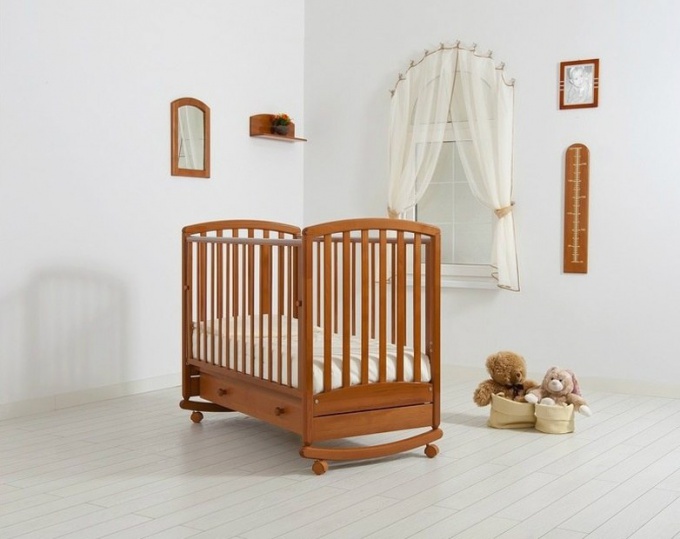
2
Buy in advance the cot mattress, which will be guided with size reclining seats. The mattress should be rigid enough, made of anti-allergic material, for example, with a filler of coconut fiber.
3
The minimum standard size cots 90х40х50 see Drill four wood hole for 90 mm each and eight at the 50 mm Hole must be at the same distance from each other, 4.5-5 cm Insert the rods in the bottom rail and the one that will be upstairs. Gather the sides of the crib using these blanks.
4
At the bottom of the design cut out and put a sheet of MDF, drill holes in it for air and attach to the frame with screws and corners. Back the back of the crib are made of plywood or MDF sheet 90х30 cm and attach it to the frame with the same screws. Cover the assembled cot of varnish in two or three layers below it has served the baby for a long time.
5
You can decorate the crib, to decorate her hand-painted, handle corners decorative furniture fittings. In addition to the crib, you can attach the roller wheels to be moved around the room.
6
If you don't have plumber's tools, you can buy a used/have a cot and refurbish it. In this case, remove the old lacquer crib with sandpaper, primed the entire surface and cover with varnish or safe acrylic paint in two layers. Cot is like new.