Instruction
1
Enter the BIOS by pressing “Del” at the beginning of booting the computer during the test RAM. After identifying hard disks the computer will enter the BIOS. BIOS is the interface the basic settings of the motherboard. Most often it looks like a standard window system, DOS. Management it is the arrow keys and press “Enter” (choosing an option) and Esc (at the exit from the open menu or cancel the changes).
2
To enable sound in the BIOS, we need to find a menu enabling and disabling devices built into the motherboard. Depending on the manufacturer and model BIOS this menu can be located in different places and have different names. So you'll have some time to walk through all the tabs menu, finding the right option. Most often these settings are located on the “Advanced” tab. One of the names under which they are hiding – “Integrated Peripherals”. If in your BIOS there is no such name for business or other similar wording.
3
If the menu was found correctly, going into it, we'll see the list of all installed on the motherboard of the devices and their connections. Among USB, Floppy Disk, Serial Port and other titles looking for Onboard Audio Controller or other similar wording. Go to its properties by pressing Enter and change the setting to “disabled” to “Enabled” (enabled) or “Auto”.
4
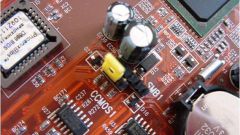
Go to the tab of the BIOS “Exit” and select the menu item “Exit & Save Changes”. On the question “Save to CMOS and EXIT (Y/N)?” press the letter “Y” to confirm and save the settings and exit by pressing “Enter”. The sound is on.
Note
If Windows installed the AHCI driver, then the device list will be something like Standard AHCI 1.0 Serial ATA Controller or Intel(R) 5 Series 6 Port SATA AHCI Controller. In that case, if anything about AHCI Controller you can not find, you should assume that support for AHCI in your system is disabled. And you can enable AHCI in Windows (as above), and then enable AHCI in the BIOS.