You will need
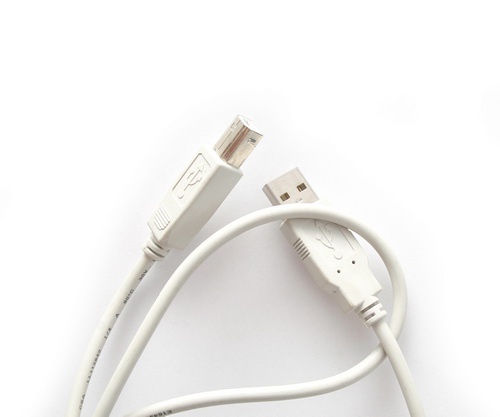
- Computer (laptop), printer, usb cable.
Instruction
1
Connect the computer to the network. Connect the printer to the computerusing the usb cable. Then turn on the computer and the printer.
2
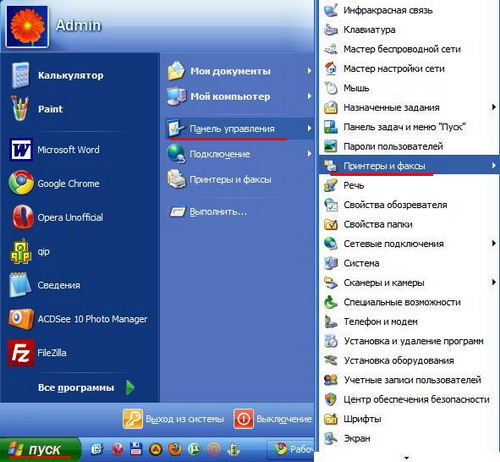
Click "start" – select "control Panel" - "Printers and faxes". You will see a window with the same name.
3
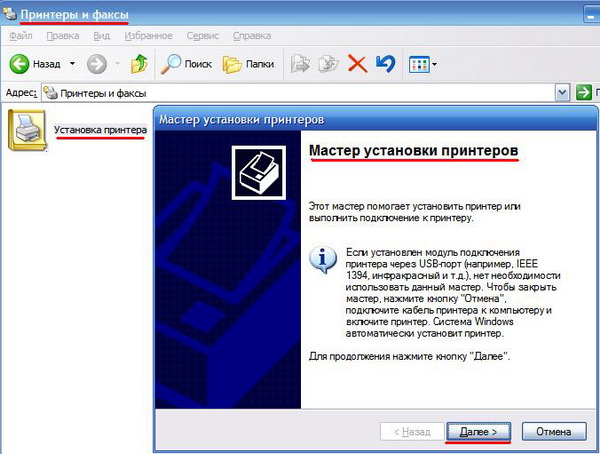
Double click on the shortcut, click "add printer". Start "add printer Wizard", click on the "Next"button.
4
Select "Auto install printer" on the page "add printer Wizard". Click "Next".

5
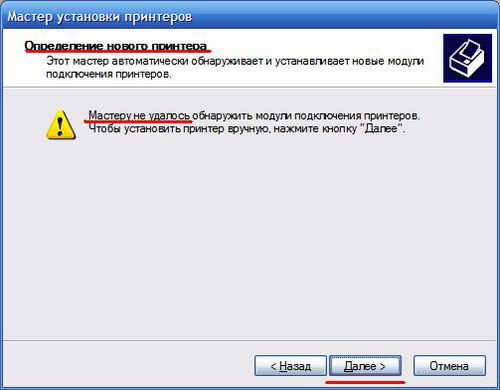
When automatically locate the printer on your system, you will see the ready to install printer. If not, then you will see a warning window reading: "failed to detect the plug-ins printer. In this case you have to install printers yourself. Click "Next".
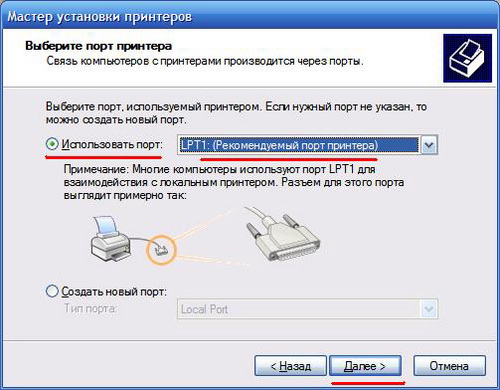
6
Select the required printer port. As a rule, you should choose the port which is the default. Click "Next".
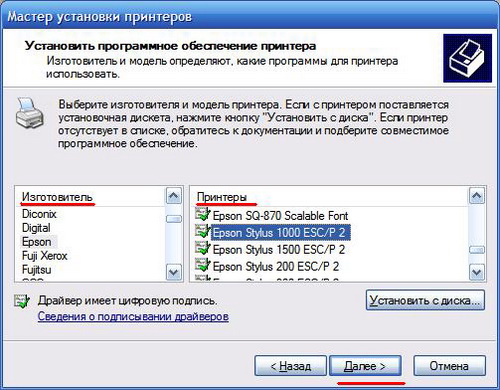
7
In this window, select the manufacturer and printer model. Click "Next".
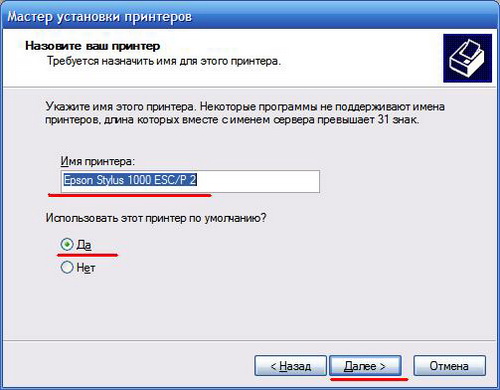
8
Enter the printer name so that it can be distinguished from other devices. And also, if you are prompted to set the printer, select "printer's default". Click "Next".
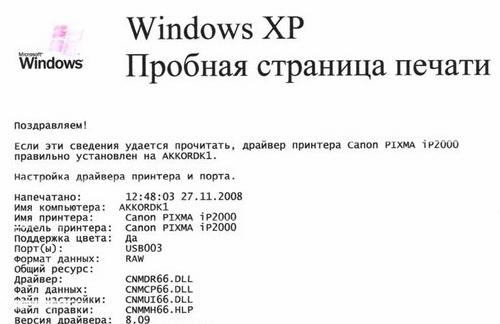
9
Summing up the done actions, as well as for consolidation, you can print a test page on your printer. This is done in order to verify the functionality of the printer.