Instruction
1
It must be remembered, however, that the process of distillation of the processor is quite dangerous and if proper care and attention can lead to instability, failure and even system damage. If you're new to the topic of overclocking (from the English. overclocking - the overclocking), you need to understand the instructions for your processor and other hardware, it is also desirable to find the jumper/jumpers/BIOS that is responsible for the FSB frequency, the memory bus, the multiplier, divider for PCI and AGP.
2
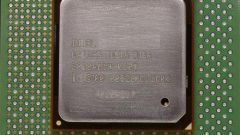
"Filling" of the AMD Athlon 64 X2 processor is a crystal that combines two cores, each of which has its own L2 cache. For processors AMD Athlon is the actual overclocking of the CPU based on the increase of the multiplication factor.
For testing the processor after the distillation you will need a program S&M or something similar. It is easy to find on the Internet. Download the program and install it.
For testing the processor after the distillation you will need a program S&M or something similar. It is easy to find on the Internet. Download the program and install it.
3
The process of distillation starts in the BIOS. To enter the BIOS press DEL during the initial stage of system boot. Open the Power tab of the Bios Setup, in it select Memory Frequency and set to DDR400 (200Mhz). A reduction in the frequency of memory will allow you to reduce the level of limiting overclocking. Then save the changes use option Save changes and exit and then restart the computer.
4
After reboot again go to BIOS. Open the Advanced Chipset Features tab, and then select DRAM Configuration. In the window that appears for each item, instead of Auto, set the values that are right of the slash sign (/). That you will continue to push the limit of stable operation for your memory.
Again, exit to menu, Advanced Chipset Features, and look for HyperTransport Frequency. This option can also be called HT Frequency, or LDT Frequency. Select it and reduce the frequency to 400 or 600MHz (x2 or X3). Next, go to menu Power Bios Setup, select Memory Frequency and set to DDR200 (100Mhz). Again save the settings (Save changes and exit). After restarting - again in the BIOS.
Again, exit to menu, Advanced Chipset Features, and look for HyperTransport Frequency. This option can also be called HT Frequency, or LDT Frequency. Select it and reduce the frequency to 400 or 600MHz (x2 or X3). Next, go to menu Power Bios Setup, select Memory Frequency and set to DDR200 (100Mhz). Again save the settings (Save changes and exit). After restarting - again in the BIOS.
5
Comes the interesting part - the overclocking of the CPU. Open Power menu, Bios Setup, select the CPU Frequency. Next you need to choose the item, depending on the BIOS version can have the CPU Host Frequency, CPU/Clock Speed, or External Clock. Increase the value from 200 to 250 MHz - that you are directly overclocking the processor. Again save the settings and boot the operating system. Run S&M and in the main menu, click "Start". If the verification system shows high stability, increase the value of the CPU Host Frequency on some items and test again system. Repeat steps until, until you find the optimal balance between overclocking and stability. You have reached the goal of your CPU overclocked.
Note
Don't forget to monitor the CPU temperature, it is desirable to exceed 60°.