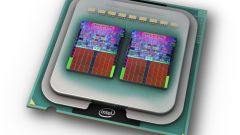
Instruction
1
Make sure that the motherboard of the computer meets all the requirements for enabling additional cores, and remember that the chosen procedure may lead to malfunction of the system.
2
Don't forget to reboot the computer system after the operation of unlocking additional cores and test it for functionality.
3
For Asus: - Southbridge AMD SB750 and 710 click on the Advanced tab and select CPU Configuration, select the option Enabled in the line Advanced Clock Calibration and repeat the same action in the box that appears Unleashing Mode;- nVidia nVidia - go to the Advanced tab and use the Configurarion JumperFree section, mark the checkbox in box NVIDIA Core Callibration to perform the desired action;- a motherboard that supports the Asus Core Unlocker - go to the Advanced tab and use the Activation CPU Core with Asus Core Unlocker.
4
For MSI:- Southbridge AMD SB750 and 710 open the Cell Menu and apply the flags on the field Advanced Clock Calibration, repeat the same action in the line Unlock CPU Core;- chipset nVidia - expand Cell Menu and navigate to the NVIDIA Core Calibration;- a motherboard that supports MSI's Unlock CPU Core - unlock Cell Menu and select Unlock CPU Core.
5
For AsRock:- Southbridge AMD SB750 and 710 click on the Advanced tab and specify the command Advanced Clock Calibration (possible options: open, menu OS Tweaker and select the same command), the L3 cache is managed in the section L3 Cache Allocation;- chipset nVidia enabled NCC - go to the Advanced tab and select NVIDIA Core Callibration, make the inclusion of additional poison in the row Active Core Setup; the motherboard that supports UCC open menu OS Tweaker and go to ASRock UCC, include additional in - line CPU Active Core Control.