You will need
- - cardboard,
- - leatherette,
- - threads,
- - Mel,
- - glue,
- - a pair of scissors.
Instruction
1
Most naturally this would look like a hat from a tough synthetic leather brown, light brown or black. First make a pattern out of cardboard that will become the Foundation of your hats. Measure the circumference of your head.
2
Cut-out cardboard brim of a hat. To do this, draw on a piece of cardboard the circumference corresponding to the head size. Margins hats on the sides make about 20 cm In the front and rear parts of the field make a small elongation. Cut obtained the brim and remove the Central circle.
3
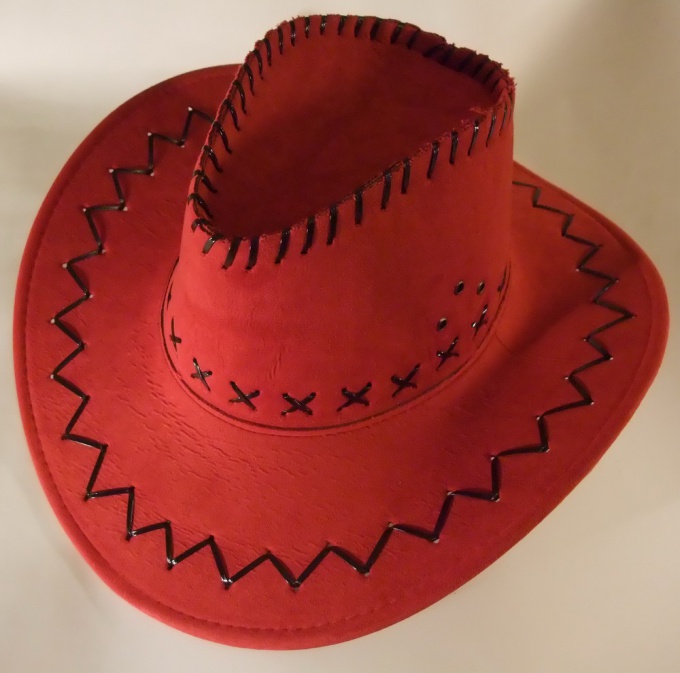
Cut strips of cardboard the height of about 20 cm for the base. Now you can start making cowboy hats out of leather. Fold the cut leather in half face inward. Lay the pattern on the brim of a cap material. Sewing circle it with chalk and cut with consideration of the seam.
4
Sew without separating the two parts together at the outer circumference close to the edge. Remove the face and insert your pattern inside of the workpiece. Sew on the inner diameter right at the front side. On the outer and inner rim diameter of the hat make decorative stitches with a thread of contrasting color.
5
Next, take the pattern of the crown and put it on also folded piece of leather. It is more rational to place the pattern along the length to bend. In other words, leave the seam allowance along the side and bottom sides.
6
Chalk circle and cut the desired segment. Fold the sides and sew together on the wrong side. Then bend the blank side inside. Glue a paper pattern of the crown on the sides.
7
After the glue dries, insert the blank. Sew the loose ends together. On the top and bottom lines of the crown empty decorative stitch and thread of a contrasting color.
8
Detail of cardboard that you received when you cut the brim of a cap, cut a circle in a single layer of leather slightly larger in order to obtain the effect of sagging.
9
Over the edge of a circle of leatherette on the front side and insert in the crown. Gently press with your fingers. Align the parts of the crown and the brim of a cap at the seams, and sew on the inner side. To the resulting joint will not interfere, use cut a wide ribbon of the corresponding color and paste it, closing the seam.
10
After drying you can bend the brim on the sides and touch up the crown of the hat. Put on the crown short strap or attach decorative Sheriff's badge.