You will need
- Photo with freckles,
- Adobe Photoshop
Instruction
1
First you need to open the image in "Photoshop".
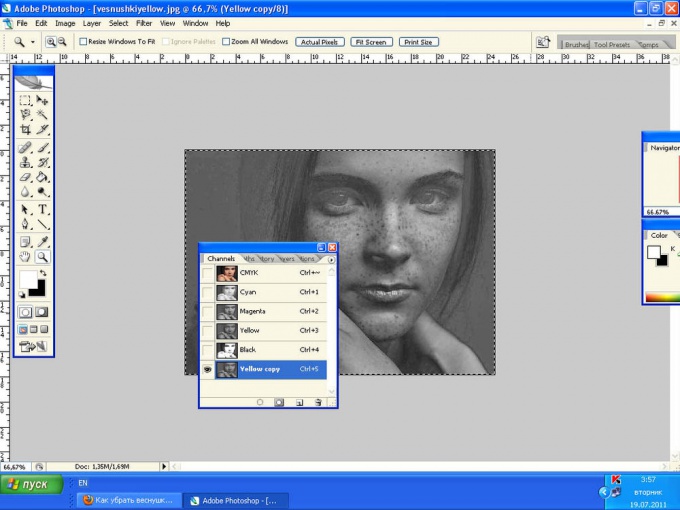
In order to make it visibly large amount of freckles, you need to find and open the Yellow channel. For this it is necessary to translate the image in CMYK, because the yellow channel is only visible in this image. In the channels palette you should find the yellow channel and click on it. After that, the image will appear a huge number of highly visible freckles that's what we need.
In order to make it visibly large amount of freckles, you need to find and open the Yellow channel. For this it is necessary to translate the image in CMYK, because the yellow channel is only visible in this image. In the channels palette you should find the yellow channel and click on it. After that, the image will appear a huge number of highly visible freckles that's what we need.
2
You must now create a new layer with the yellow channel. To do this, press Ctrl+A, to select all the image. Then press Ctrl+C to copy the selected channel into the buffer. Insert the same it's a Xerox of it will be necessary later.
3
Because a color channel is taken from the CMYK is coming a lot of changes in color. But they can be bypassed. This should go to the History palette and click on the first step, i.e. the initial image.
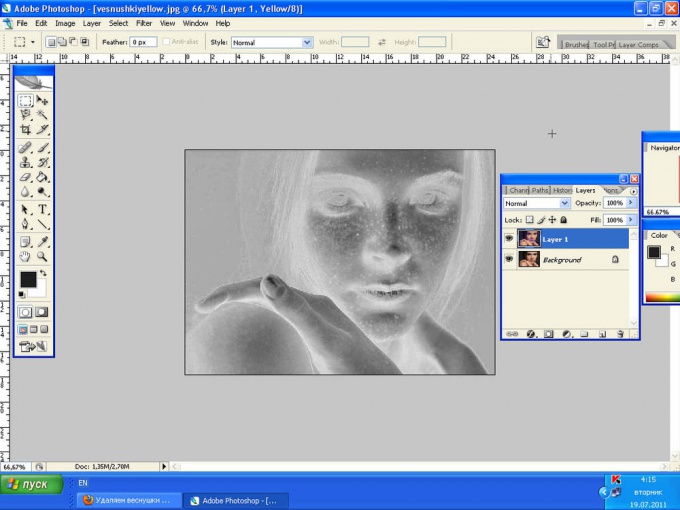
Then you need to press Ctrl+V now and it's a Xerox of a previously inserted image, in black and white. This produces a new layer with the yellow channel.
Then you need to press Ctrl+V now and it's a Xerox of a previously inserted image, in black and white. This produces a new layer with the yellow channel.
4
Now, immediately remove freckles. For this we need to invert the layer. This will help the hot key Ctrl+I. so, the layer is inverted.
5
Next, you should mix the layers. Therefore, it is necessary to change the mode "Blend" (Blending Mode to "Overlay" (Overlay) and set the "Opacity" (Opacity) way to remove freckles.
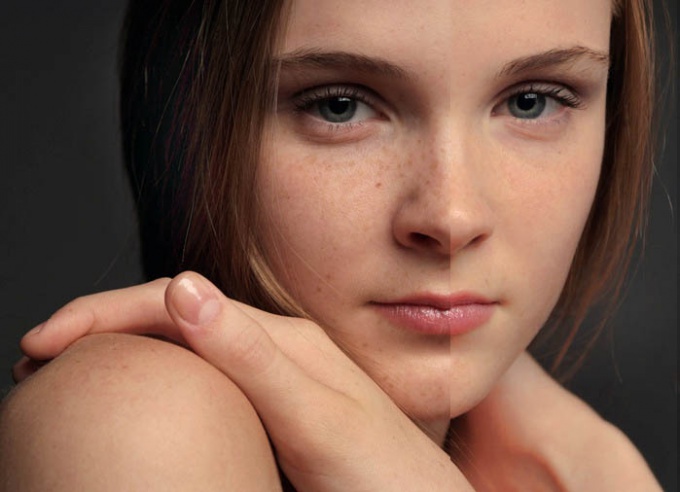
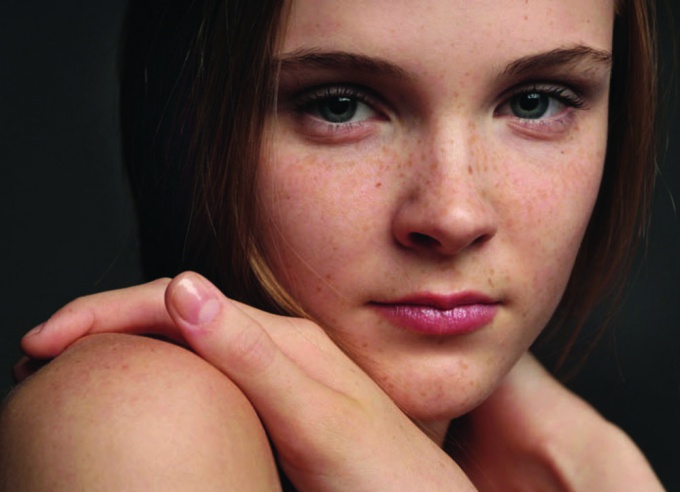
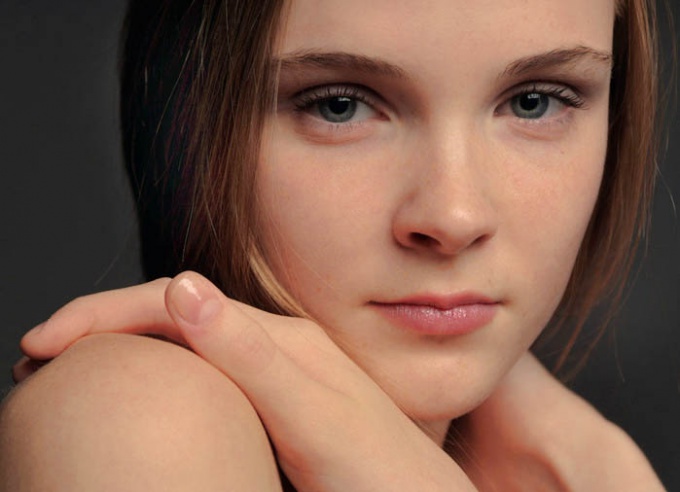
The result is a skin, "purified" from freckles.
This effect can be applied to all open parts of the face. For this it is necessary to apply a layer mask, then fill it with black by clicking on the photo.
Now, choosing as the main color white and a brush of medium hardness, need to paint, newly emerged freckles. In the process, the layer mask must be activated. Hair and details, it is better not to touch.
This work can be considered completed.
Note
This lesson helps only for light brown freckles but not dark.
Useful advice
At the end of the work it is necessary to work on the contrast of the image, because during manipulation it will change.