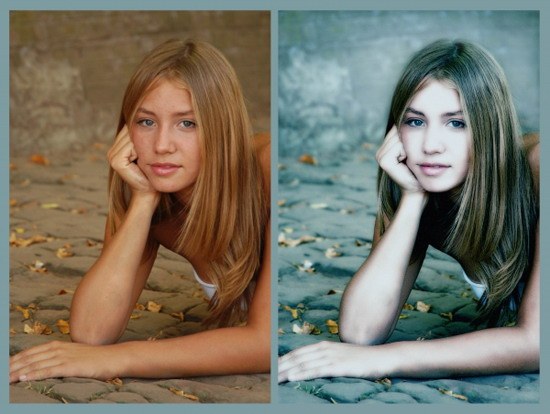
Instruction
1
Download editing Photoshop. Click on the tab of the top menu file (File) and click Open (Open). Alternatively, you can press the shortcut Ctrl+S. Open a photo clear and large enough image of a person. Make a copy of the background layer by clicking on the Background layer (the background) and pressing Ctrl+J.
2
Zoom in on the pictures and drag the red frame within the Navigator (Navigator) on the area with clean skin. Press S on the keyboard. In the toolbar click on the given tool and select the Clone Stamp (rubber Stamp). Reduce rigidity (Hardness) and size (Master Diameter) of the brush.
3
Hold down the Alt key and click to place the face where the skin is very smooth and has an even color. Release the Alt key. Brush tool "Stamp" on the place that you want to adjust. Check if there are any defects.
4
Highlight contour face using tool Lasso Tool (Lasso). Put the starting point, to frame the face and completes the allocation of the starting point. Copy the selected contour twice by pressing Ctrl+J. Hide the second layer by removing the eye from the box to the left of the layer.
5
Activate the first layer and press Ctrl+S. A window will open with curves (Curves). Put an arbitrary point on the line and iscriviti it so that the layer became bright. Put a peephole in the box next to the second layer. So you make it visible.
6
Press Ctrl+L and darken the layer by putting an arbitrary point on the line. Create a third layer. Pour the corporal shade (the closest to the color of human skin color #c18d78). Place this layer between the bleached and dark layers.
7
Click on the clear layer. Open the tab Layer (Layers). Select Layer Mask (Layer mask) and click Hide All (Hide all). The same repeat with the tinted layer and the layer fill.
8
Select the layer with the brightened face. Take a soft opaque brush by pressing I. In the palette, select white. Swipe a white brush on the areas of the face that need to be clarified. Select the layer with the brightened face blending mode to Soft Light (soft light).
9
Repeat the same manipulation with layer fill and layer, etc. The layer with the darkening be basically the places that should remain dark (for example, eyes, eyebrows). Adjust the combination of light, dark and Nude colors to achieve an even tone skin.
10
If the use of the tool "Stamp" does not suit you, then copy the background image with Ctrl+J. select the tab from the top menu Filter (Filter), then select the Blur group (Blur) and click on the words Gaussian Blur (the Gaussian Blur). Move the window slightly to the side. Move the radius slider to blur the face. Click OK at the end of the blur.
11
Switch to the copy of the background layer, grab the toolbar eraser (Eraser) with a small hardness. Erase the extra blur beyond the contour of the face and also blurring of eyes, mouth and other vital parts of the face. Set the opacity of the layer to about 30-40%. The tone of the skin will be aligned. Combine the layers into one by a combination of Ctrl+Shift+E.
