You will need
- - Photoshop;
- image.
Instruction
1
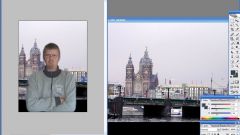
For making the most simple background you need to create a layer and fill it with color. Open the file with the object to which you want to add a new background, option Open the File menu and unlock the only layer from which the image is downloaded, by double-clicking the icon in the form of a castle.
2
Option Solid Color New Fill Layer group on Layer, add the file to the layer filled with color and drag it under the unlocked photos. Turn on the Lasso tool, draw with it, the object in the foreground, and clicking on the button Add layer mask, add layer mask.
3
For visual separation of the object from the background , create a shadow. For this option Duplicate Layer menu Layer, copy the layer with the object and turn it into a template for the shadows, the Bay black color or darkening the layer using filter Brightness/Contrast which can be found in the group of Image Adjustments menu. Set the Contrast maximum value, and the value of Brightness set at minimum.
4
Blur created a black silhouette option Gaussian Blur band Blur Filter menu. Move the shadow under the layer with the object, or the figure that casts it, enable the Move tool and move the dark layer in the direction opposite to that which the object the light falls. Can reduce the transparency of the shadow by setting the Opacity to achieve more realistic pictures.
5
Dark background you can liven up, creating a spot light with a gradient fill. Add the file to the layer using the Create a new layer button, turn on the Gradient Tool in Radial mode and the Gradient fill in the layer with a radial gradient with a light middle and dark edges. If the middle part came out dark, turn on the Reverse option in the settings of the gradient and repeat the fill.
6
Move the gradient under the object layer and mask. Can give a bright spot on the background of arbitrary shape, slightly smearing the edges with Smudge tool Tool.
7
To give the extra depth you can use scattered in a random order prints brushes of different sizes. This method can be useful in that case, if the color of the background simulates the shade. Create a new transparent layer, activate Brush tool and select the Brush Tip Shape tab of the brushes palette pattern round shape.
8
In the same tab, check Spacing and adjust the value so that between the individual brush marks remained for a considerable distance. Tab Shape Dynamics and set Size Jitter value about sixty percent. This will allow you to obtain prints of different sizes. In the Scattering tab, check Both Axes and set the scatter brush marks, focusing on changing the picture in the preview window.
9
Fill the layer with the imprints of the brush. Slightly blur the traces with a Gaussian Blur filter. Add to the document another layer and randomly put prints on it the same brush, increasing its diameter. Apply to this layer blur, reducing its radius compared to the previous. Reduce the opacity of the created layer and move it under the layer with the foreground object.
10
To save the file with all the details of the background, each on separate layers, use the Save As option from the File menu, selecting the psd format. To view or upload to the web, select the jpg format.
