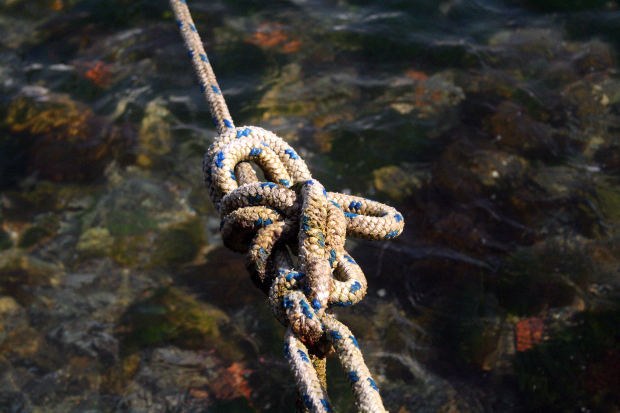
You will need
- Rope
Instruction
1
Take the rope in your left hand and right hand create a closed loop by bending the rope in half. The free end of the rope is called the chassis, and the other, respectively - a native.
2
Get running end of the rope to the left, over the root end.
3
Make a turnover with a rope around the root rope from the bottom. How would loop the rope around itself. Many are able to do this movement with one hand, deftly tossing the rope and threading the running end on the fly.
4
Pull the rope from below and paste it into the top loop from the intersection, the route from itself to form a "eight". Is a single "figure of eight". In this form, this node is not used because it is easy to untie. Therefore, in most cases, they use "dual eight".
5
Stick or wrap the rope end around the point of attachment. So that the running end out on top, and the loop -"the eight" remained at the bottom. Perhaps the reverse fixture, but this option is more preferred and more often used by climbers and mountaineers.
6
Insert the free end extending from the fulcrum in a previously obtained "eight". The rope is usually either passed through a carabiner, or inserted in a safety system, or wrapped around the iron pipe or any other support.
7
Repeat "eight" threading the rope by way of the previous one. Try not to twist, insert the free end of the inner side so that the "eight" was completely parallel. It is important that the cord was not damaged as the result of the load, moreover, the node will be easier to untie. Because after many failures and povezani she will carefully be tightened and not twisted.
8
Pull the loose end of the string, slightly pulling on it. The tip should not be too long or hang out. It's just inconvenient to clean up the tip is too long, you can tie the control node. If you attach the rope to a support or to the carabiner, the rope can be fastened with duct tape before and after the node.
Note
If you use the carabiner, the figure-eight knot
fastened easier, without attachment to the fulcrum. Just make a single eight double rope, folded in half.
fastened easier, without attachment to the fulcrum. Just make a single eight double rope, folded in half.
Useful advice
For this node do not use a thick rope with a diameter greater than 1 centimeter. Usually with his help, on the contrary, thicken thin.