You will need
- - Photoshop;
- photography.
Instruction
1
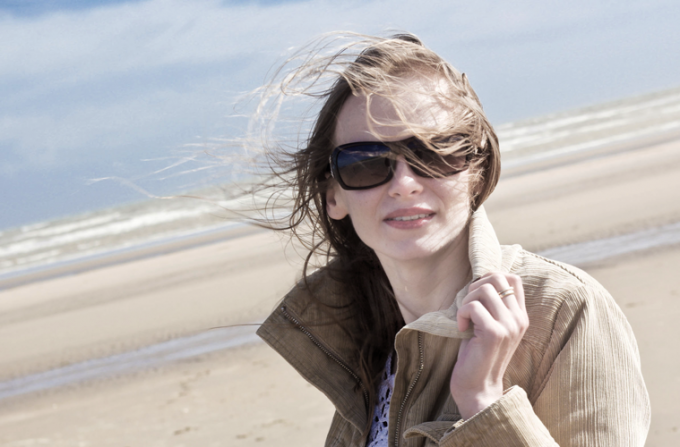
The option of applying the Open ("Open") in the File menu (File) editor, Photoshop open the picture you want to put in order. Shifting to the right the slider located in the bottom area of the Navigator palette (Navigator), increase the magnification the field of photography with which you are going to work.
2
Use Shift+Ctrl+N paste on top of the picture layer for retouching. Including the Clone Stamp tool, enter a fragment of a photo from which the program will copy the colored pixels needed for masking hair. To do this, click on the appropriate area of the picture, located near the strand, which should be removed from the face by holding the Alt key.
3
Release the button and click remove hair. The result looked carefully use the brush with a small diameter. Include in the settings the option the Clone Stamp to Sample all layers ("Sample all layers"), you will receive the opportunity to copy the pixels of the background, working on the layer that lies above it.
4
Working with the Clone Stamp requires patience and a fair amount of time. If you need to quickly clean short dark hairs from the skin with a distinct texture that often have to do when processing male photos, you can use the Dust&Scratches filter (the"Dust and scratches").
5
Combination Ctrl+J to a file, add a copy of the snapshot. Apply Dust&Scratches filter, include the option of group Noise ("Noise") menu Filter ("Filter"). Configure the settings for the blur so that the hair in the picture ceased to be visible.
6
Click Add layer mask ("Add layer mask") from the bottom of layers palette add a mask to the processed picture. Selecting a mask, invert it with Ctrl+I. the result of the blurred layer completely disappear.
7
Using the Brush tool (Brush) paint the mask in white colour in those places, which in the picture it is necessary to remove hair. To return blurred fragments part of the texture of the skin, apply a top layer to the background Lighten (the"Replacement light").
8
To save the processed photos use the option Save As (Save as) File menu ("File").