You will need
- the mixture for filling the floor;
- - primer;
- - crampons (special shoes for moving on the floor fill);
- - a needle roller;
- - conventional and notched spatula;
- - capacity for dilution of the mixture.
- - an electric drill;
- - building mixer.
Instruction
1
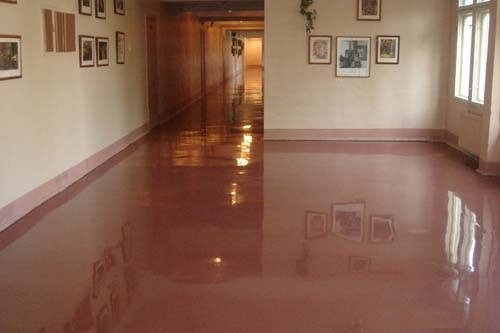
Think about what parameters and types of self-leveling floor you need. First of all, pay attention to the thickness of the floor. To do this, set the point at which to place the surface of the liquid floor, and measure the distance from it to the concrete base. The position of the highest point of the floor may be determined by various conditions: the position of the lower edge of the door, level floor in other rooms, etc. If the necessary thickness of self-leveling floor is greater than 40 mm, in order to save can be laid on a concrete base screed and over it pour a thin layer (10-15 mm) self-leveling floor.Select the type of floorthat you would like to have. There are many types of screed ranging from the simple (under the flooring) to the decorative, each of which has its own characteristics. Of the total abundance, you need to choose the type that is optimal for you, as the characteristics and price.
2
Purchase all the necessary materials and the tool for the job. Required quantity of the mixture is determined by calculation of the volume of the filler floorbased on its area and thickness. The purchase of materials it is desirable to make prior to the training grounds, since the acquired mixtures may require special materials and special processing base. All preparatory work should begin only after reading the instruction on pouring concrete self-leveling floor.
3
Prepare the base. Seal all cracks, crevices, chipped putty. After drying, cover the base with primer. Use a spatula or roller. If the first coat is absorbed into the ground, cover it with the second layer. The surface should be relatively smooth, completely sealed, does not absorb and donate moisture, not to provide in a liquid mixture of any gases, including water vapor. Before proceeding give time for the primer to dry completely.
4
Mark on the wall the point position of the upper level floorto have a reference point, to what level should pour the floor. If the requirements to the level of the floor is not hard and it can vary in certain limits, the markup can not do.
5
In that case, if the fill area is too large, divide it into sections. Of the edges align the guide markers, the upper edge of which should be level with the surface of the floor. Markers are set on a thick mortar for screeds. Before you start to fill the floor, the mortar should be fully hardened.
6
Dissolve the dry mixture for filling the floor with water using a drill mixer with a construction. Perform this operation very carefully, measuring the exact amount of water. Breeding some of the compounds is required to exercise intermittently. All details of this operation are reported in the instructions for leveling the floor, follow them strictly. Any deviation from the instructions may have a negative impact on the quality of the floor.
7
Pour the mixture on the floor, starting with the most in-depth (if any) of the plots. The mixture is poured gradually over the whole surface of the filled area. Flatten it out with a notched trowel and laminate the surface with a spiked roller. The purpose of the last operation is to smooth the mixture and remove from it air. Move around fill the floor with "cats" – Shoe designed specifically for the job. Operation floor start after it is completely dry. This is specified in the instructions.
Useful advice
If the base on which is poured the floor is loose, it should be covered with a special paste with grit top-quartz sand. In addition to strengthening the grounds, this operation increases the adhesion of the base with the floor – thanks to the rough surface formed by sand.