You will need
- Plaster model
- Lamp
- Easel
- Pencil
- Paper
Instruction
1
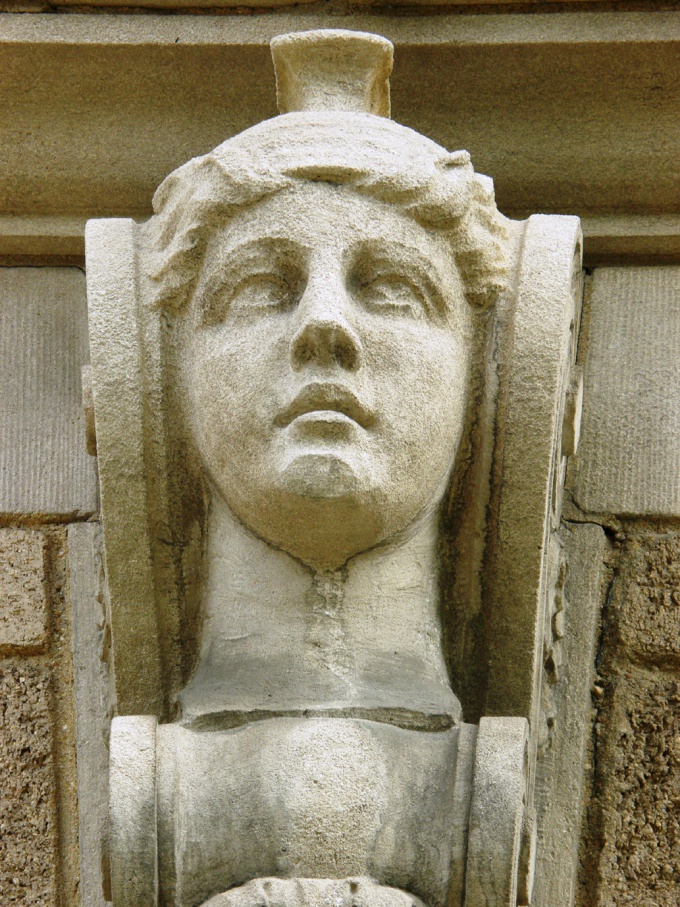
Put the model on the table. The table should stand at a minimum distance of 3 meters from the painting. It is better if the distance is bigger. If you paint the apartment, put the table with the model in one corner of the room, while they themselves sit in the opposite. Attach on the model of the light source so that the light fell from above at an angle of 45°. Eyes should be level with your eyes. If you are just beginning to draw, put the head full face.
2
Pick up draperies. The background should be lighter shaded parts of the head and darker lit. You can also use "optical illusion", taking a light gray background. It will seem lighter than it is near the shaded parts of the model, and near-lit — on the contrary.
3
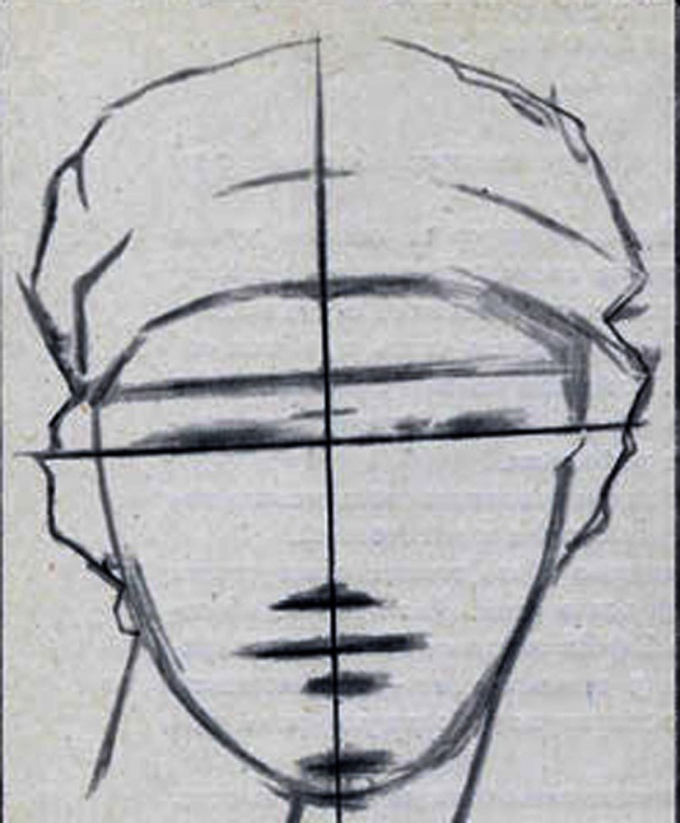
Mark on the sheet the reference point. First, draw a vertical line approximately in the middle of the sheet. In height it equals the distance from the middle of the forehead to the chin. Mark the horizontal line of the eyes, nose, lips and other. Line the eyes pass across his face, the rest of the guidelines just to outline.
4
Indicate the ratio of the width and height of a person in different parts. Mark shared oval. Sketch the neck line. The proportions of length and width should be observed as accurately as possible, otherwise, then it is very difficult to draw individual parts of the face.
5
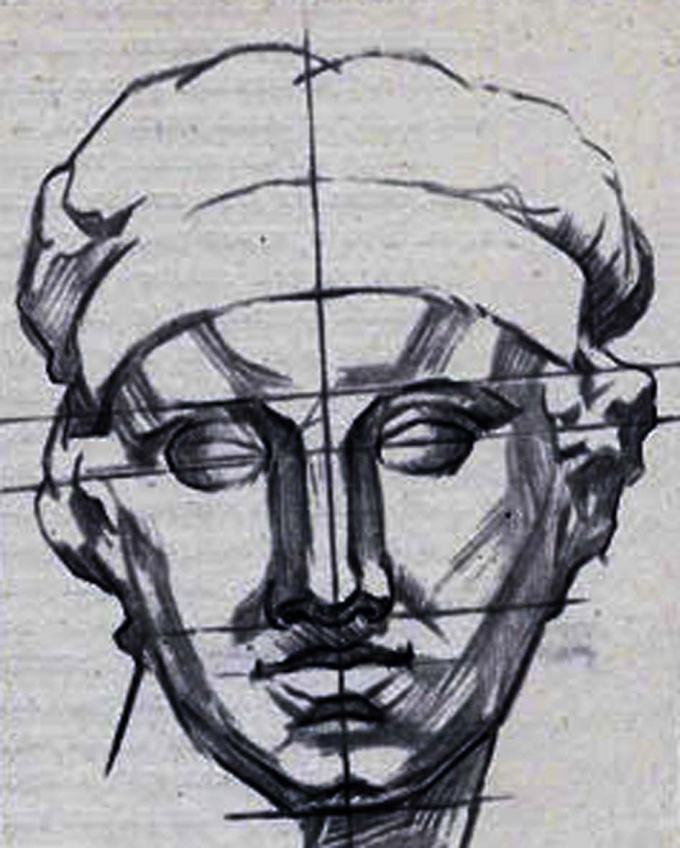
Set the volume of the head. The surface, reaching to the nape, separate from the front. This is done by using different types of shading. Mark the proportions of the individual parts of the face. Mark's eyes. Compare their proportions with the proportions of the head. Similarly, draw the nose and mouth, constantly comparing them with each other and with the size of the head shape. With a simple hatch mark the main surface of the head. Lit places leave white. On a dark surface apply eye shadow.
6
Give plastic the shape of the head. Carefully inspect the model and determine where one surface changes into another. How sharp is this transition? Some surfaces to smoothly flow into each other, and they separated a little more dense shadow. The illuminated surfaces are moving in the shaded dramatically. In the lower part of the face, if the lighting is installed on top, the lines are more smooth and rounded.
7
Please note for the future. This is especially important when drawing the external parts of the head. Pay attention to how and in what proportion reduced some of the surface. Observe term.
8
Go to a more subtle detailing of the head. Determine how many surfaces is each part, and how these surfaces interact with each other. For example, the forehead consists of five different surfaces, which are separated from each other by density of shading. The same applies to the nose — it consists of several parts, which are normally not visible, but for proper construction must be visible. Make smooth transitions between different surfaces. Do it with pencil hatching.
Useful advice
For the lighting model is better to take the daylight lamp. If not, put the model closer to the window.
If you start to draw the head first and on their own, follow a sequence of actions. In the future, draw the head as a whole, indicating only the main lines and common oval.
Light and shade give a light shading with a pencil. No need to use gum for the whitening of some parts. Better to leave the surface of the unshaded, gradually adding the shadows.