You will need
- Movie Maker 2.6.
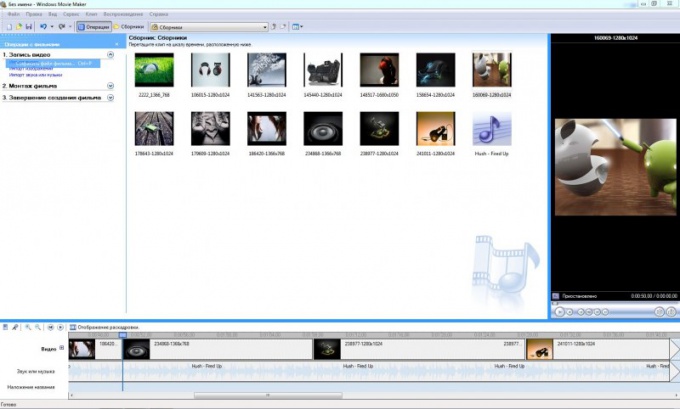
Instruction
1
To begin, download the installation files of Windows Movie Maker. Use the version that fits your operating system. It is worth noting that Movie Maker is included with Windows XP. If you are working with newer versions, download the installation file from the Microsoft website.
2
Run the downloaded file and install the program Movie Maker. Open the "start menu" and click on the icon of the program. Most often this application is used to merge a large number of files-images to video. Open the menu "File".
3
Select "new project". After changing the mode of the program again go to the menu "File". Select "Import into collections" and launch Windows Explorer. Select the image files that will be included in the project. Alternately add each file to the workflow project.
4
Press Ctrl and Select the music track that will be present in your clip. All files should appear in the menu "Collections".
5
Now click "Display the timeline". This will allow you to quickly synchronize the location of the images. Alternately move each file in the Video category, is located at the bottom of the window.
6
Align the display time of each slide. First, hold down the Ctrl key and scroll the mouse wheel itself. It is necessary to zoom in. Now select the slide and change the time display. Similarly, set the timing for the remaining images.
7
Follow this procedure until, until you match the boundaries of music track and video. Verify correct location of the images.
8
Open the menu "File" and select the option "Save movie file". Wait for the launch of the new menu, select the file format and specify where it is stored. Check out the resulting film, running it available player.