You will need
- tablet or easel;
- white paper for drawing;
- - the range;
- - hard and soft pencils;
- - sharpener;
- - eraser;
- paper napkins or cotton pads.
Instruction
1
Attach to an easel, or tablet sheet of loose paper for drawing. Sharpen the pencils. Choose the right photograph that will serve as a model for a portrait. Better to start with a person located full-face or half-turned. Don't take portraits with a lot of difficult to draw the details. The image of beards, moustaches, glasses or numerous wrinkles – work for an experienced artist.
2
Mark Fox auxiliary grid. Draw a rectangle the size of the corresponding face of the future. Draw a vertical line dividing it in half. Draw three perpendicular – the first will set the eye line and the second the tip of the nose, and the third is the place where will be drawn the lips.
3
Referring to the photo, draw the outline of the face. Pay attention to the shape of the chin and full cheeks. Mark the contours of the nose and eyes and eyebrows. Follow the symmetry of the figure, focusing on the vertical line dividing it in half. Draw cheekbones and eye sockets, otherwise the face will look flat.
4
Soft pencil , scroll to the nostrils, contour of the eye. Darken the pupil and draw the eyelid. Indicate the contour of the lips. Examine the drawing and erase construction lines. Future work continue with a soft pencil.
5
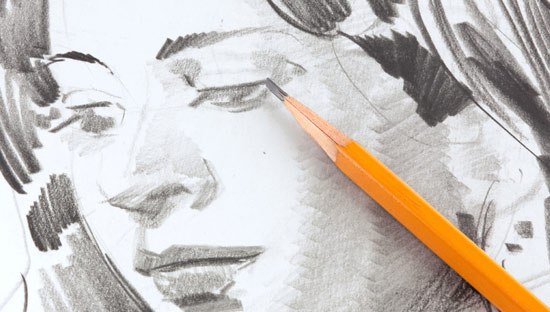
Cover the face with subtle touches of pencil lead and RUB it with a paper towel or cotton pad. Proceed to the imposition of the shadows, forming the relief of the face. Darken the crease of the eyelid, temples, the inner part of the eye sockets and the sides of the nose. In the area of the nostrils amplify the push of the pencil. Trace the outline of the eyes, shade the iris and the pupil put in the white highlight the corner of the eraser.
6
Trace the outline of the mouth. Make the upper lip darker, in the middle of the lower light deliver glare – it will give it volume. The area of the eraser slide along the back of the nose narrow white strip. Subtle touches of the pencil mark the shadow in the corners of the mouth and under the lower lip.
7
Start working on the hair. Mark the line of parting and draw strands, taking the pencil from the parting to the ends of the curls. Change the pressure of the pencil so the color turned out uneven. When you are finished, go over the hair with a cotton pad, shading touches. On top of restoroute spend more how pencil lines. Stroke the curves of the curls and again RUB the stylus.
8
Area eraser vysvetlit the glare on her hair, taking it from roots to ends. Put a shadow under the chin, outlining the neck line. Examine the illustration and swipe the remnants of the stylus. The portrait is ready.