You will need
- Graphic editor Adobe Photoshop.
Instruction
1
If you want to define the color at some point of an already existing image, start by loading it into the editor. This is done in the dialog called by Ctrl + O - with it, you need to find in the computer an image file, select it and click "Open".
2
If you want to determine the color at a point on the monitor screen download in Photoshop copy of the image from the screen. It's easy to do - click on the keyboard Print Screen, switch to the image editor, press Ctrl + N then Enter and Ctrl + V.
3
Once you have the picture open in Photoshop one way or another, turn on the eyedropper tool and press with the English letter I. you Can do this by clicking on the corresponding icon on the toolbar of the graphical editor.
4
Move the mouse pointer to the desired place in the picture. If you want to define the color of a small element, to enlarge the image - press Ctrl and "Plus" the desired number of times. When need to return back to normal size, use Ctrl + Alt + 0.
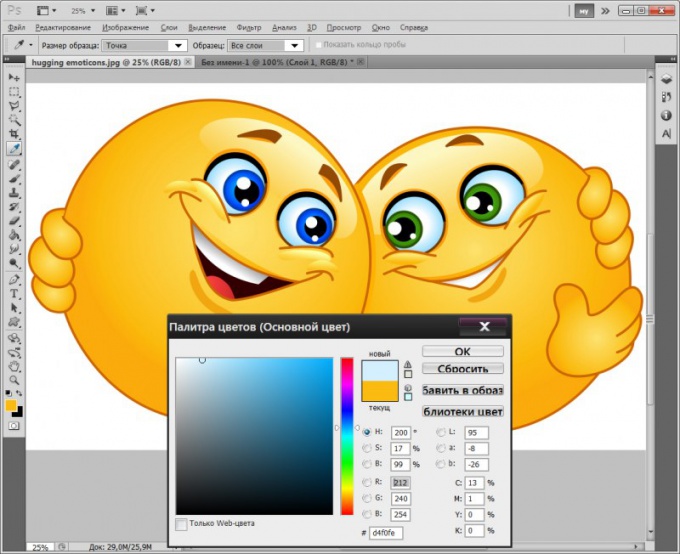
5
Press the left mouse button - the graphic editor will determine the shade at the point of the cursor and set it as the working color. If you need to get the result in numeric view, you can open a palette of colors - click on the icon of two overlapping squares at the bottom of the toolbar. In the opened window select one of the numerical representations. The elements of the decomposition of the colorand RGB and CMYK encodings marked here are relevant letters, and the hex code is placed in the field at the sharp sign # at the bottom of the window.
6
If you need to make the inverse operation, i.e. set the work color by a known numeric representation, use the same palette. Components of the encodings of RGB and CMYK have to score manually, and the hexadecimal code, you can copy the source and paste it into the appropriate field in the palette. The color will be set when you click the OK button.