Instruction
1
Click on the desktop item My computer, open the drive that contains the operating system, select the Windows folder and sub-folder Microsoft.NET. In this directory, open the folder Framework, and will be able to see the version of the framework installed on your computer. Also go to this folder through any other, typing in the address bar the path C: (or other drive system)/WINDOWS/Microsoft.NET/Framework.
2
The required information can be obtained in another way. Open the registry editor. To do this, click on the "start" or Windows button and select from the menu "Run". This will open a new dialog box. Enter on a blank line with no extra characters regedit.exe or just regedit and press Enter or click OK.
3
If you cannot find the Run command in the start menu, right click the mouse on the taskbar and select the context menu item "Properties". In the opened window select the tab "start Menu" and click "Configure" next to "start Menu". In the new window, click on the "Advanced" tab and select the marker item "Execute" in the "start menu Items". Save your changes.
4
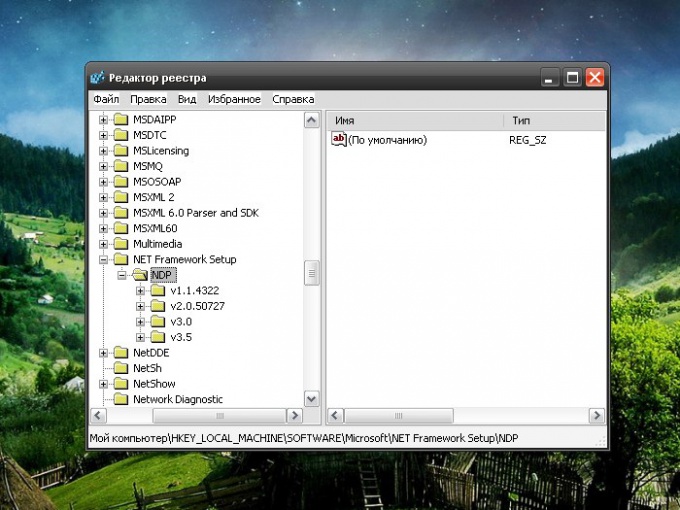
In the registry editor installed version of the Framework can be viewed in several places. Expand the HKEY_LOCAL_MACHINE branch, select the sub-items SOFTWARE and Microsoft. First time the version found in subparagraph NETFramework, but for more information scroll down below the branch to the sub-item NET Framework Setup and expand the branch of the NDP. While in the registry editor, be careful not to make any changes to the keys if you do not know what you are doing.
5
Also specify the version of Framework you can use special utilities, for example, NetVersionCheck. Install the application on your computer and run it through the file VersionCheck.exe. Wait until the information gathering and review the results in the program window.