1. Preparation of walls under plaster
This unique solution helps to disguise the height differences that were originally present on the wall. But all this is from old materials, which covered the surface of the previously, you need to get rid of completely. That is, removed the old paint, the previous Wallpaper and any other type of finish. For better adhesion of plaster to the base of the latter also have primed. Dry primer will be about the day. Only then can you move on to applying building composition.
2. The application of textured plaster on the wall
The application of this solution is about the same as an ordinary plaster. To do this, use a wide spatula, which, the construction composition is applied on to the surface from areas of 1-2 m2. At this stage not necessary to achieve the appearance of beautiful terrain. But you need to make sure that all irregularities have been compensated. After all, in the preparation of the surface alignment was not performed. She textured plaster can be used to solve this problem.
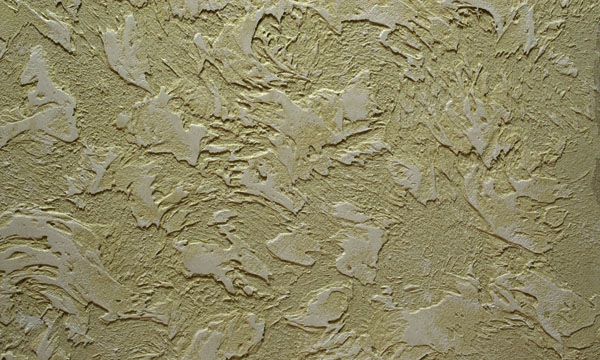
3. Creating relief on applying the plaster
When the whole surface will be covered by workers composition, just start generating invoices. It can be created using different tools. For this we use a special textured roller, a narrow plastic spatula, a hard sponge, and other handy tools. The owner can decide which texture is more appropriate in his case. But be aware that the textured plaster originally is composed of components that partly determine the subsequent relief.
4. Finish grout plaster
After complete drying of the plaster grout is carried out with emery cloth. This procedure helps to get rid of the remaining defects, and also to give a finish more spectacular appearance. Sometimes, for greater protection of the plaster against the negative effects of additionally applied a transparent varnish. But this procedure is optional. In any case, following the described technique, the owner will be able to achieve high quality finish.