
You will need
- - password and login in the settings menu of the router;
- - admin rights Windows 7.
Instruction
1
Open control Panel, and then click on "Network and Internet", go to "control Center network and sharing". Then select "Change adapter settings" in the left column. Then right-click on the icon of the network adapter and select "Properties" from the context menu.
2
Click on the tab "local area Connection" in the right column and select "Properties". Select "IPv4" in the window that opened and select "Properties" at the bottom. This will open the configuration table of the IP address. This method is suitable for most computers as DHCP is enabled by default.
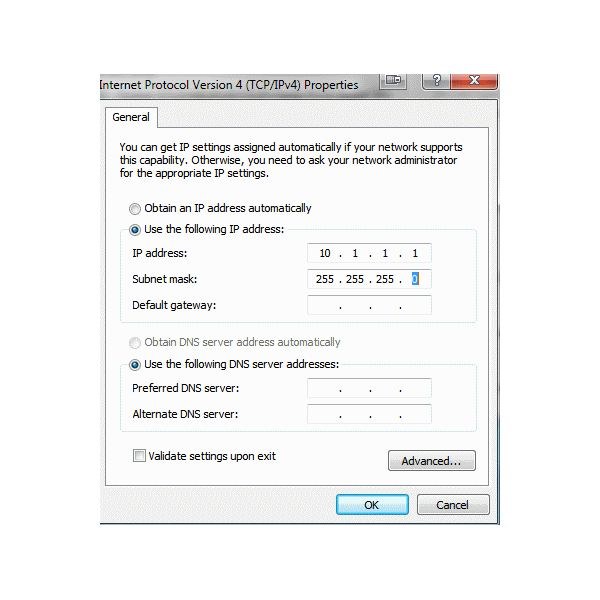
3
All you need to do here is to change an existing IP address to the one you need. To do this, click on the "Use the following IP address" and fill in the address, subnet mask, and default gateway. You can then choose whether to manually assign the DNS server or not.
4
After you close all Windows by clicking "OK", the system must manually assign your chosen IP address. The network connection may get lost for a couple of seconds. It shall then again be restored. If not, check the IP address you chose to make sure it is correct.
5
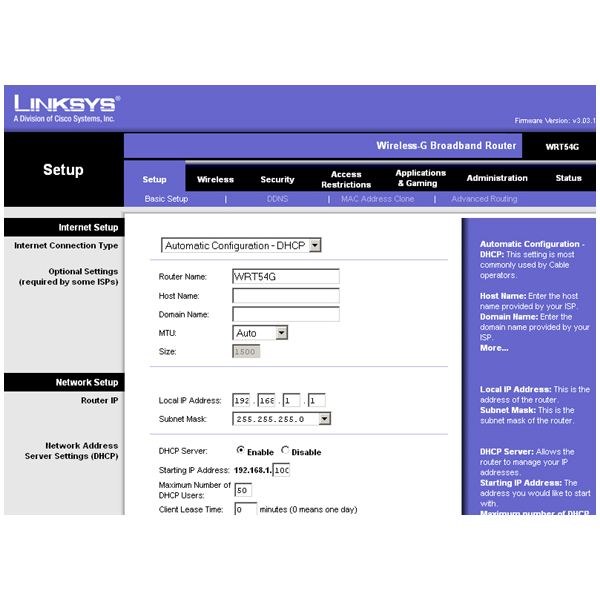
If you are connected to the Internet through a router, you will have multiple IP addresses for each device. Make sure that you change the IP address that you need. You must select from the suggested addresses, otherwise you will lose your network connection. To change the IP address through the router, you must first go to the settings of this device. For this you will need a password and login. When you get into the settings menu of your device, go to tab "network Settings" and change the IP address by selecting new from the drop down menu.
Note
If your router has a built-in DHCP, you can set a dynamic IP address within a certain range. You can also manually assign a specific IP within that range for the computer.
Useful advice
Your IP address provided by ISP or pre-configured in the home router. If you are connected directly to the Internet via modem, you will not be able to change the IP address of your computer. If you still need to do this, change your modem or contact your ISP. Disabling and then re-enabling the modem will also allow you to change the IP address. In this case, you will not know your new address.