You will need
- a drill with a special nozzle or chisel and hammer;
- spatula;
- film and cloth;
- protective eyewear;
- work gloves;
- respirator;
- the drill and glass cutter.
Instruction
1
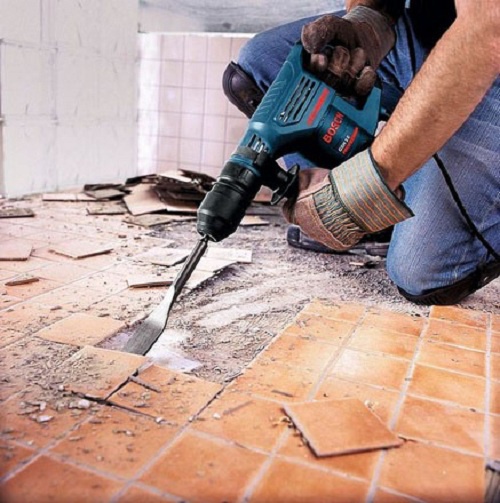
The easiest way to knock down the old tiles with a hammer. This method is quick, convenient and not damage wall because the hammer causes a lot of neat little bumps and not able to accidentally hit too hard on the surface, while the man is more complicated to calculate the load. Chipped tiles , start with the top row and gradually work your way down. Remember that working with a hammer is always very dusty, so wear protective goggles and a respirator. For hand protection gloves are required. If the room contains items that can be damaged by falling debris, cover them with a rag and tape. Work slowly and carefully in the places where the pipes and fixtures. Sometimes after the removal of tiles remaining pieces of glue – they too need to be removed with a punch (if they're large and durable to keep), or removed with a spatula, if the old glue is unreliable.
2
If you have no drill, you can use a chisel and a hammer. The technology is almost the same as in the previous paragraph, but instead of electric motor you are working with your own hands. This method is very time-consuming, so if you have to remove large amounts of tiles, still think about buying punch. Prices for batteries start from 1500 rubles, and you will save time and effort. If you are not able to buy it or don't see the point, then remember: hammering must be done very carefully, preferably finely tap on the chisel than to swing and hit. One careless movement and you can knock out a cavity in the wall that will have to putty, and if the tiles are glued on a slate sheet in the bathroom – a hole or even split it.
3
The most difficult point is the removal of individual tiles. There is a special technology that allows you to shoot down the tile and not damage its neighbor. For starters, you need a spatula to wirapati grout on the perimeter. Then drill a power drill with a special nozzle a few holes in the tile – this will allow relatively easy to break it without damaging the rest. Still need swipe the tile glass cutter crosswise – after this procedure, it will shoot up mainly along these lines. At this preliminary stage is completed. Now take a chisel and hammer and break the tile in the center. After it split down the pieces with a chisel, starting from the middle. Don't hit too hard not to touch unnecessary parts of the coating. After the tile is removed, bring down the remains of the glue from the wall, otherwise the new tile will stick out above the rest.
Note
Sometimes tile adhesive at the installation level the surface. So be sure to check it with a level when clear.
Useful advice
Small but rugged lumps of tile adhesive can be brought down with a sharp chisel – it is easier to pick up this material.
