You will need
- Graphic editor Adobe Photoshop
Instruction
1
Open the file of the original photo. To do this, press CTRL + O and in the opened dialog to find the desired file. In the dialog window it is possible to view the contents of the selected file before you open it, so to be mistaken difficult.
2
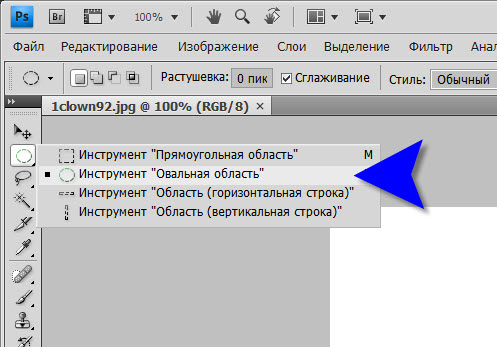
You'll need a tool to select pictures on an oval region. On the toolbar, click the left mouse button second from the top icon and hold the button for a few seconds to see the list of in which will need of your oval selection.
3
Now we must allocate the necessary circular area of photography. Hover over the upper left corner of the image, press the left mouse button and holding it drag the pointer diagonally to the lower right corner. The selection size will increase and when you release the mouse button, it is locked. If you do all this with the CTRL key, the selected area will be geometrically correct circle. But without this button, you are free to create an ellipse of any degree of splyusnutist.
4
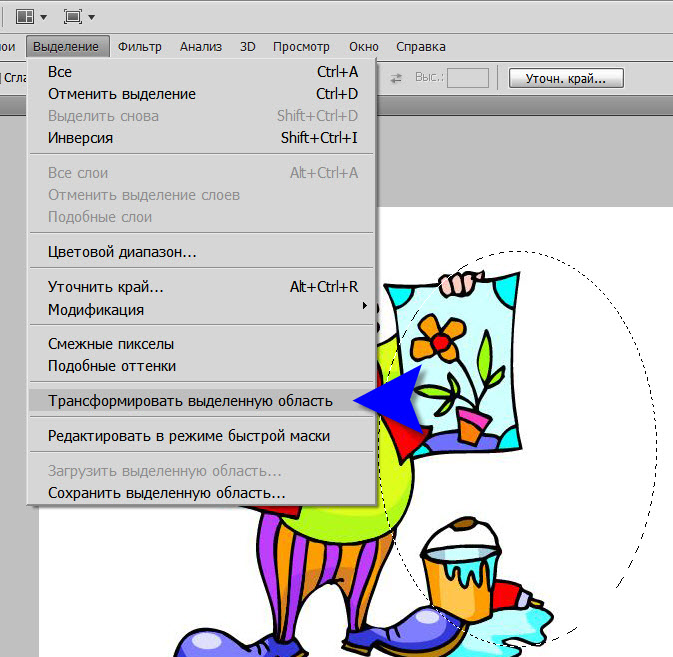
After the selection is made, it is possible to produce with the additional manipulation. For example, it can be moved by dragging with the mouse or pressing the arrow keys. Move quickly with the arrow keys obtained while holding down the SHIFT key. You can change the shape of the selection - for this expand menu Selection and select Transform selection. When finished fit form - copy selected area with CTRL + C.
5
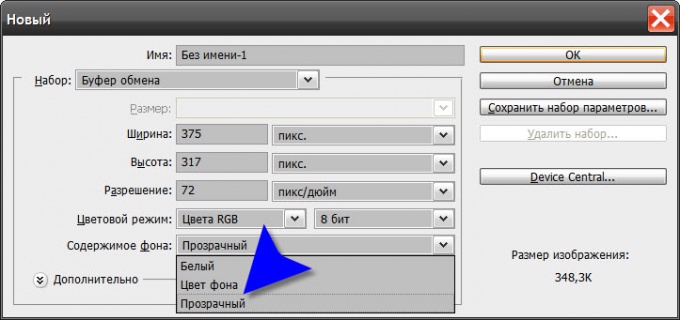
Now create a new document press CTRL + N. Photoshop will automatically select the sizes corresponding to the width and height of the copied area of the image. And you have to choose in the drop-down list Contents "background" paragraph "Transparent" and click "OK".
6
In the generated document, paste the copied region, press CTRL + V. Here, if you wish, you can edit an oval picture - add text, background, effects, etc.
7
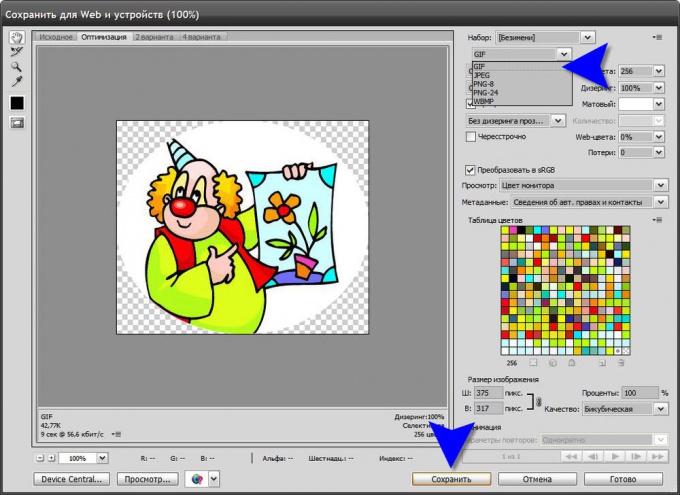
Left to save the edited picture - press the shortcut keys CTRL + SHIFT + ALT + S. In the dialog that opens, specify the desired file format, select it in the second from the top drop-down list. Formats GIF and PNG support transparency, JPEG not. But JPEG can better convey smooth color transitions (gradients). Choose the desired option and press the "Save" button, and then specify where and with what name it is necessary to save the file.