Instruction
1
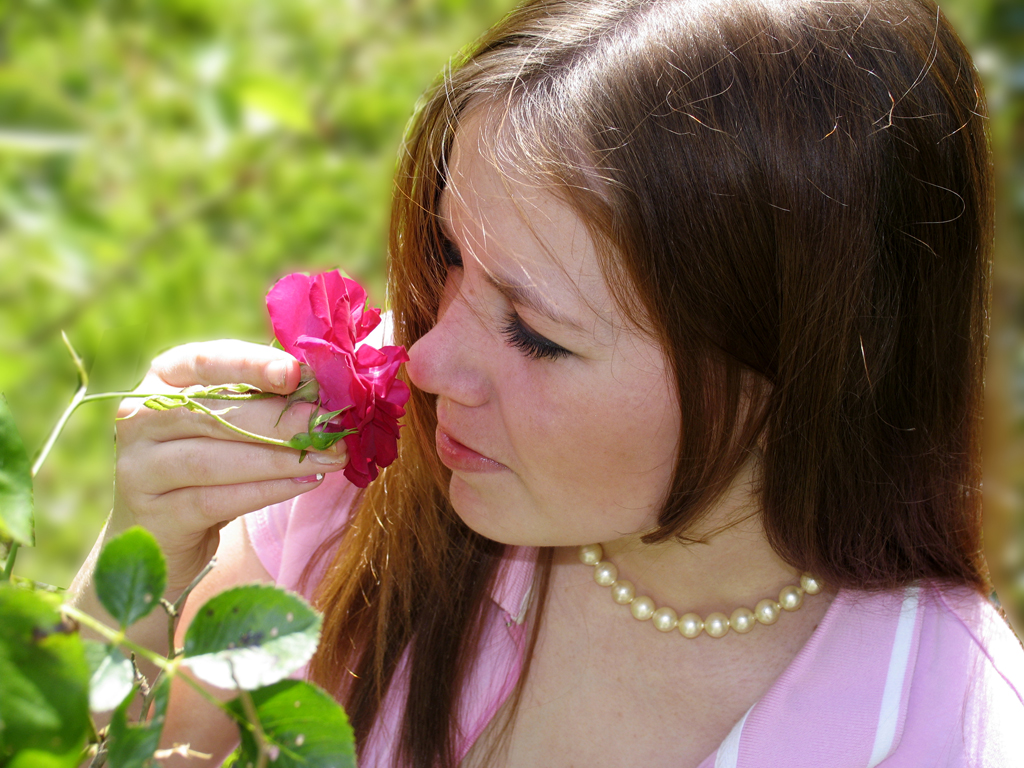
Pick a photo in which you want to change the background. It is best to choose a high-quality image with a large figure in the foreground – in this case, the end result will look much better. Try to avoid photos with very fine details – for example, to make this effect on a photo where the girl badly disheveled hair, it will be quite difficult.
2
Now launch Adobe Photoshop and open the photo with which you will work. In this photo the background is a little blurred, we will intensify the effect.
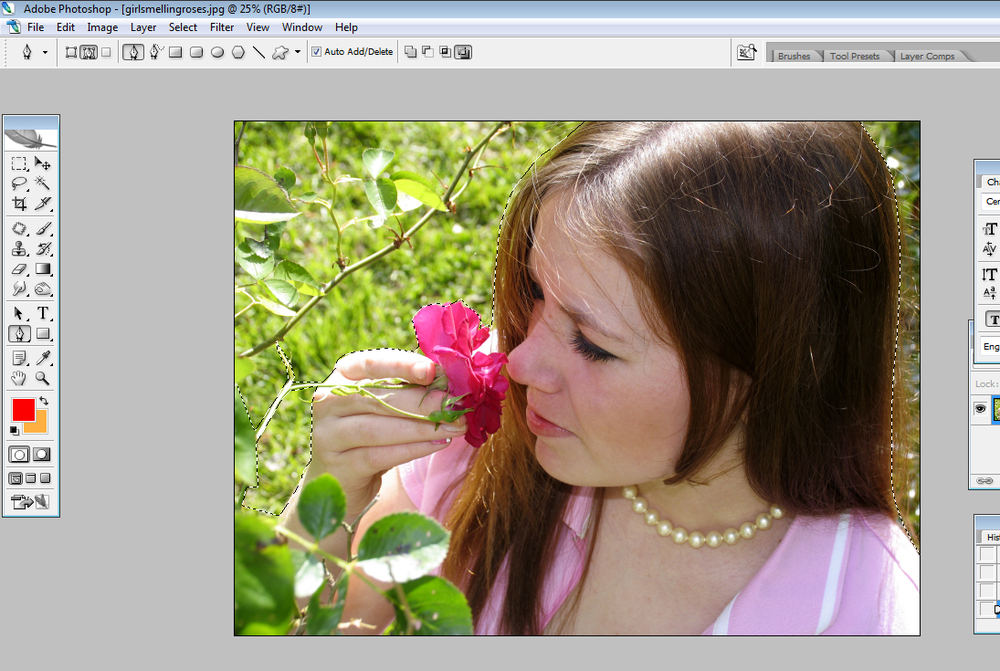
3
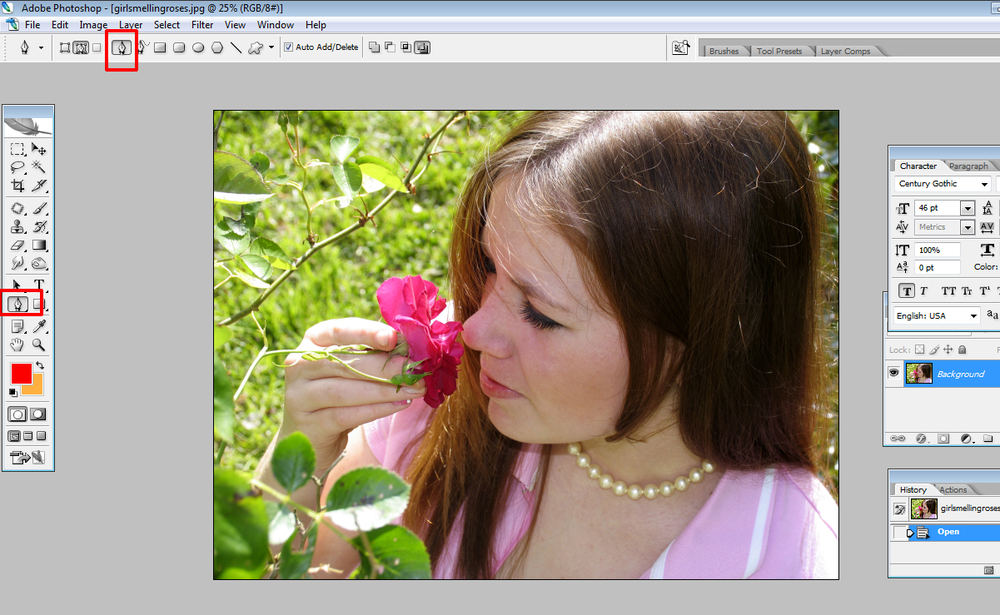
Now select in the toolbar the tool 'Pen tool' ("Pen"). On the top bar select the icon of the pen on the box.
4
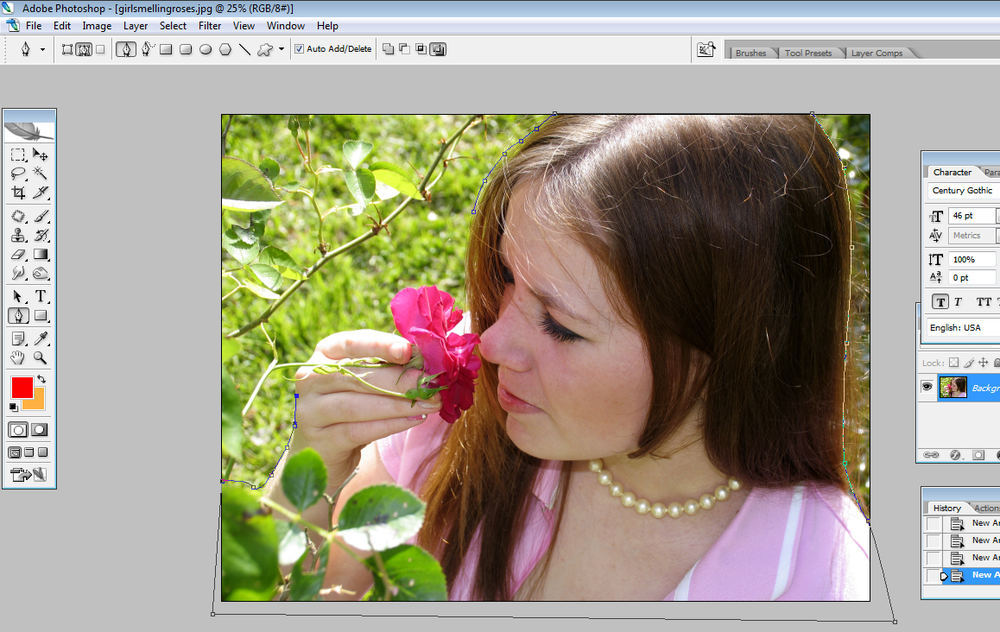
Using a pen, placing the contour points, circle the figure that is in the foreground. In our case it is the figure of a girl and flower, in addition, we take the leaves off the front. Try to trace accurately, not "slicing" the image details. All that will remain from us for a loop, and will be a blurred background. If you can not exactly trace the contour, it is better to capture more space than less – in the future it can be corrected. In the clothing business this would be called a seam.
5
Click on the picture, right-click and select 'Make selection' ("Make a selection"). Now your object is highlighted with a dotted line.
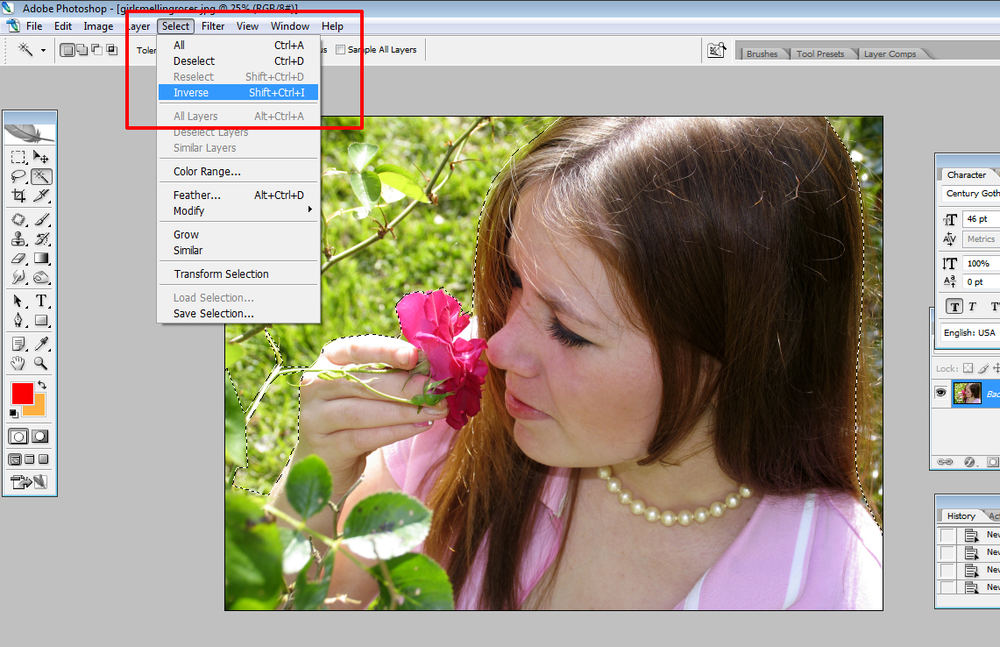
6
Select the top menu item 'Select' (Highlight), and then 'Inverse' ("Invert"). We have now selected the background, not the object.
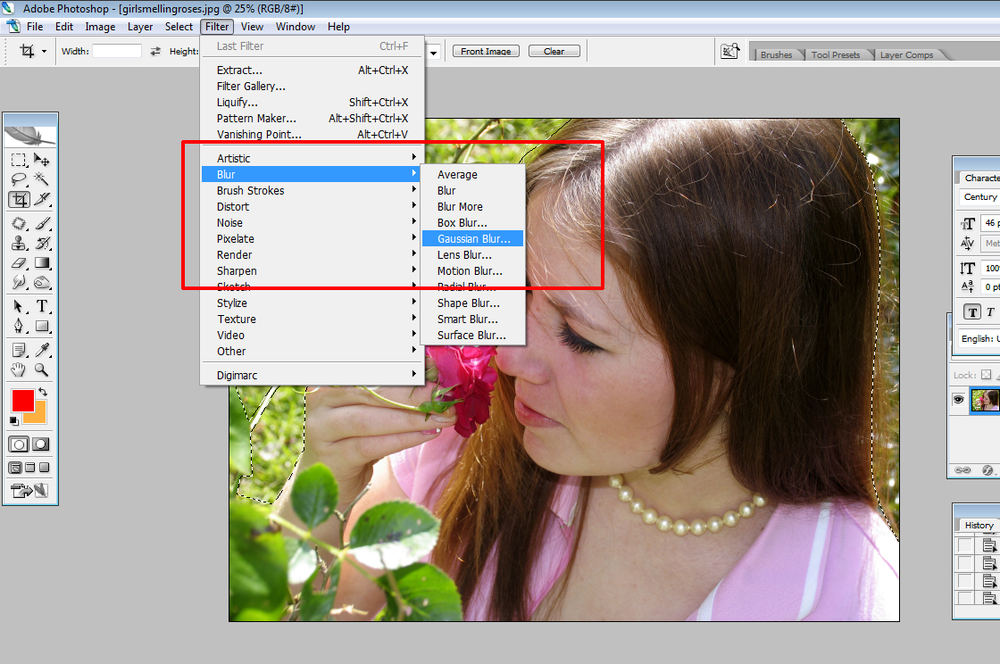
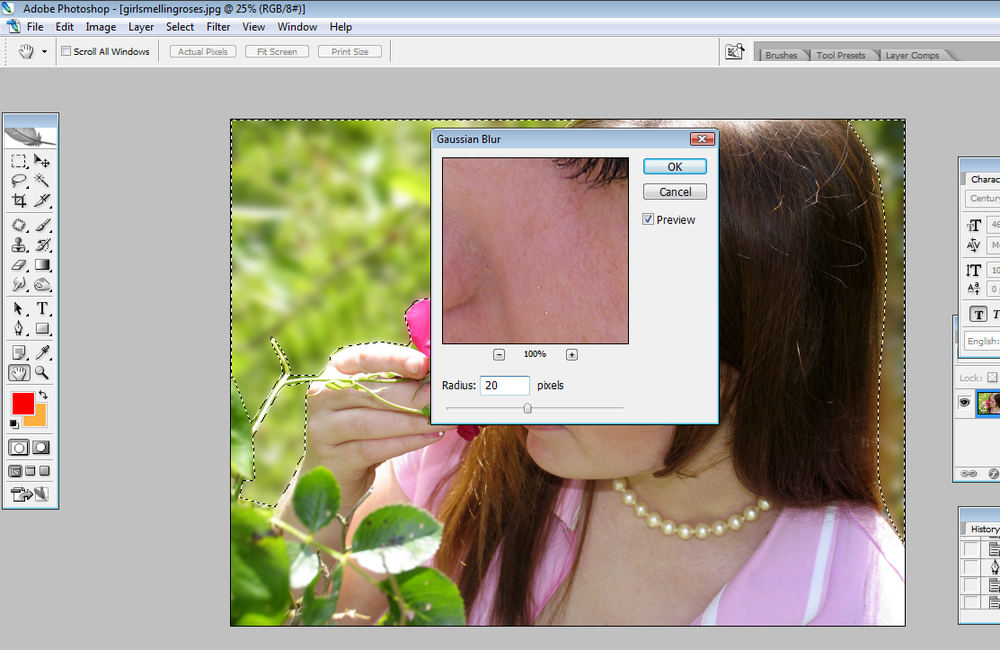
7
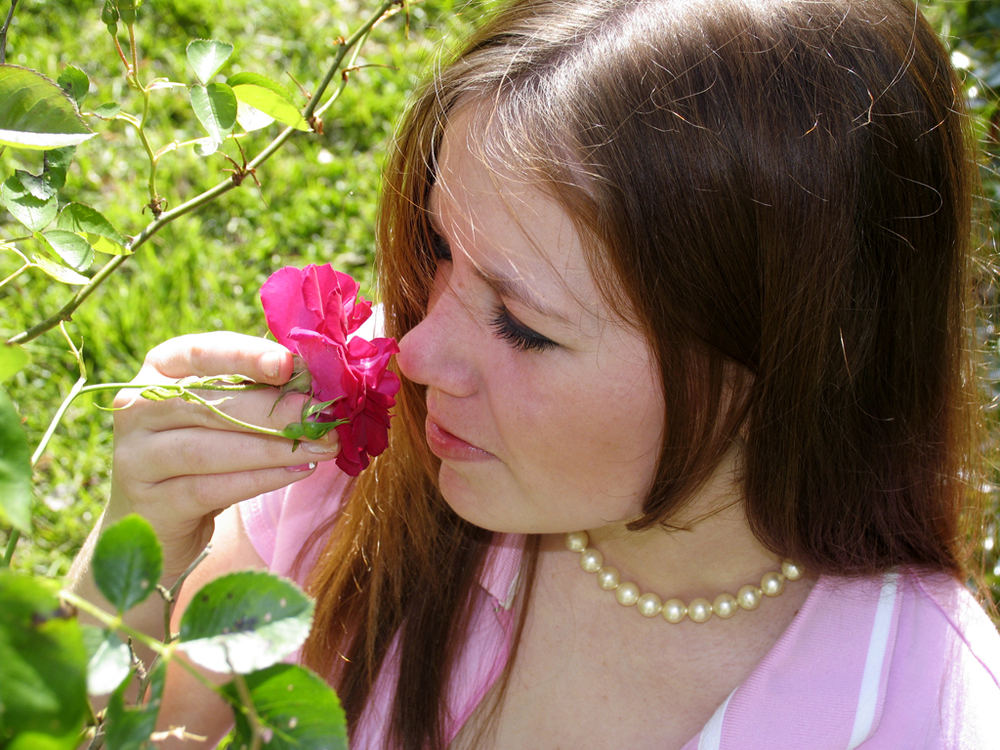
Now in the top menu, select 'Filter' ("Filters") then 'Blur' ("Spot"), then 'Gaussian Blur' ("Blur Gaussian").
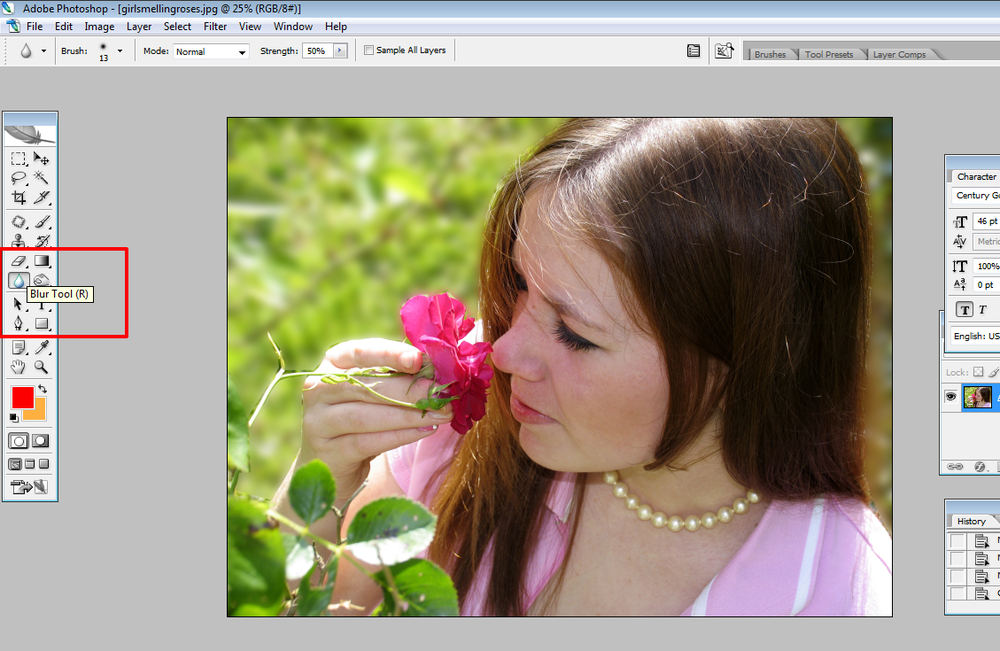
9
Then, if necessary, take the 'Blur tool' ("Blur") and a thin brush to further blur the borders around the object. Try not to capture the contour, so that the image was realistic.
10
Now save the image in the desired format.