Unfortunately, in present operating system vendors do not supply USB drivers, so that memory stick the user will create themselves. However, this is no big deal.
Described in the article by the way, you can install on a netbook different Windows versions: XP, Vista, 7, 8. For this you will need a flash drive with a storage capacity greater than 1 GB, the image file from the appropriate operating system (the extension of a file .iso) and utility UltraISO (link to free download utilities attached to the article).
1. Download from the official website of the developers tool UltraISO, install and open it.
2. Click the "Bootstrapping - > Burn image hard disk".
3. In the window that appears, select the USB drive that you want to do the installation, then select the image file with the operating system and make sure the write method USB-HDD+.
4. Click on the "Burn" button and wait for the end of the process.
So, bootable flash drive ready. If the netbook was desired files and programs – take a backup. Though usually after installing a new operating system all the old files stored in the directory Windows.Old on drive C, however better safe than sorry.
1. Insert the flash drive into the netbook.
2. Open My computer and go to the installation drive.
3. Run the file Setup.exe in the root of the stick.
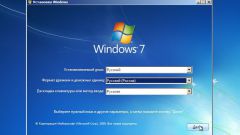
4. In the resulting window, select Windows installation.
5. This will start a standard installation of the operating system. Follow the on-screen instructions and wait for the installation process. During the installation your computer may restart several times. Once you see the picture with the new Windows logo at boot - this will mean that the installation is in principle completed successfully.
The downside of this installation method is that you will not be able to format the drive on which you installed the operating system running the old version. If you don't like this option, use the following method.
As in the previous method before you begin the installation, make a backup of your data.
1. Insert the installation USB flash drive on a netbook.
2. Restart the computer and enter the BIOS.
3. If the BIOS has a blue background - way in the left side section Advanced BIOS Features using the arrows on the keyboard move the pointer and press Enter. A window will appear with boot options of your computer. Put it in First Boot Device - USB-HDD Second Boot Device - CDROM Third Boot Device - Hard Disk or HDD-0.
4. If the BIOS has a gray background - go to the tab Boot, then use the arrow keys to move the pointer to Boot Device Priority and press Enter. Displays the boot order of your devices. Change the order so that USB was first in the list CD/DVD Disk - the second, Hard Disk third.
5. After setting the desired order, press F10 and Enter.
6. After that the computer restarts, then the screen appear the words Press any key to boot from CD or DVD. The reader needs to press any button, and the new version of "Windows" with a pre-inserted stick will be installed.
7. Follow the on-screen instructions of the Windows installer and wait until the installation process. During the installation your computer may restart several times. Once you see the picture with the new Windows logo at boot - this will mean that the installation is in principle completed successfully.
Described in the article by the way, you can install on a netbook different Windows versions: XP, Vista, 7, 8. For this you will need a flash drive with a storage capacity greater than 1 GB, the image file from the appropriate operating system (the extension of a file .iso) and utility UltraISO (link to free download utilities attached to the article).
The procedure for creating a bootable USB drive
1. Download from the official website of the developers tool UltraISO, install and open it.
2. Click the "Bootstrapping - > Burn image hard disk".
3. In the window that appears, select the USB drive that you want to do the installation, then select the image file with the operating system and make sure the write method USB-HDD+.
4. Click on the "Burn" button and wait for the end of the process.
Installation on the netbook using My computer
So, bootable flash drive ready. If the netbook was desired files and programs – take a backup. Though usually after installing a new operating system all the old files stored in the directory Windows.Old on drive C, however better safe than sorry.
1. Insert the flash drive into the netbook.
2. Open My computer and go to the installation drive.
3. Run the file Setup.exe in the root of the stick.
4. In the resulting window, select Windows installation.
5. This will start a standard installation of the operating system. Follow the on-screen instructions and wait for the installation process. During the installation your computer may restart several times. Once you see the picture with the new Windows logo at boot - this will mean that the installation is in principle completed successfully.
The downside of this installation method is that you will not be able to format the drive on which you installed the operating system running the old version. If you don't like this option, use the following method.
Installation on the netbook in the BIOS
As in the previous method before you begin the installation, make a backup of your data.
1. Insert the installation USB flash drive on a netbook.
2. Restart the computer and enter the BIOS.
To enter the BIOS, you must boot the computer when the first graphical image on the screen, press the DEL button on the keyboard until you see the setup screen. This is the BIOS.
3. If the BIOS has a blue background - way in the left side section Advanced BIOS Features using the arrows on the keyboard move the pointer and press Enter. A window will appear with boot options of your computer. Put it in First Boot Device - USB-HDD Second Boot Device - CDROM Third Boot Device - Hard Disk or HDD-0.
4. If the BIOS has a gray background - go to the tab Boot, then use the arrow keys to move the pointer to Boot Device Priority and press Enter. Displays the boot order of your devices. Change the order so that USB was first in the list CD/DVD Disk - the second, Hard Disk third.
5. After setting the desired order, press F10 and Enter.
At this point, the reader asks a boot order, wherein the first boot the flash drive, then floppy drive, then hard disk. In the future, such order to return to his previous state is optional.
6. After that the computer restarts, then the screen appear the words Press any key to boot from CD or DVD. The reader needs to press any button, and the new version of "Windows" with a pre-inserted stick will be installed.
7. Follow the on-screen instructions of the Windows installer and wait until the installation process. During the installation your computer may restart several times. Once you see the picture with the new Windows logo at boot - this will mean that the installation is in principle completed successfully.