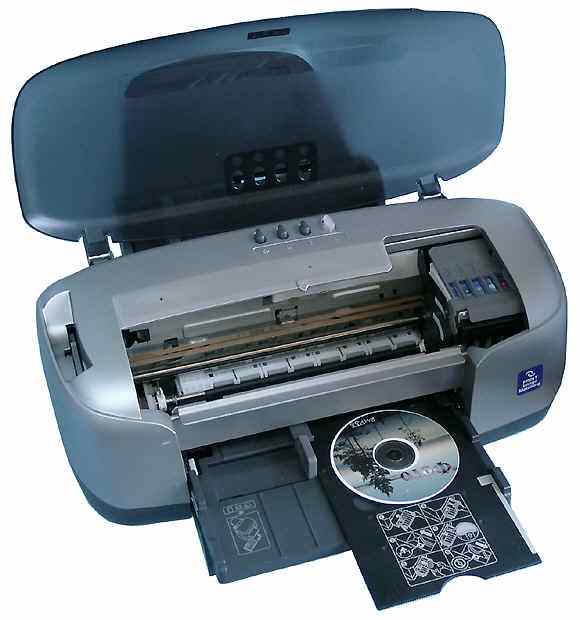
You will need
- printer;
- - software for printing on discs;
- disc Printable.
Instruction
1
Buy a special disk for printing on the printer marked "Printable" (they may be the inscription "Printable with ink jet printers" or "Printable on the label surface"), such discs are not more expensive than usual. Some printers allow you to print on mini-discs, to do this, buy a mini-disk "Printable".
2
Note the necessary data on the disc before printing on it. Otherwise, on the disk surface after printing can be dust, fingerprint and damage, causing a write error.
3
Find the printer device receiving the disc tray, open the printer cover. If the tray is not inserted, insert it, making sure the printer is turned on. If the power is off when inserting the tray into the printer, it will not perform adjustment of the print position.
4
Put the disc in the tray to print side facing up. In the tray you can put only one disk! If you are printing on mini disc, find a special adapter that must be attached to the printer in the kit. Insert it into the tray, and then insert the mini disk into the adapter. Before inserting a disc, make sure the tray there are no foreign objects that could damage the face of the disc intended for recording. Insert the disc tray into the printer in the grooves.
5
Install on a computer attached to the printer program (for example, Epson Print CD, or CD Label Print). If it is installed, open it by clicking the icon on your desktop or search for it in the start menu.
6
Using the open program, create the desired image or lettering that you want to print. The program allows you to paste existing texts and pictures, and draw your original image.
7
Click "Print" in menu "File". Opens a dialog box in which select the desired printer in the first line. The third print option "media Type (Media type)". Select from the list the CD/DVD. Check the Print Confirmation Pattern setting is "None" (instead of print the template). Hit "Print".
Note
If you use for disk printing tray from another printer that can be moved to the print position and printing will be performed correctly. Only use the tray supplied with your printer.
Useful advice
After the command to print the disk was given to the printer, you cannot insert the tray, it may lead to printer damage and scratches on the disk. So don't forget to insert the disc tray before printing.
After printing, check the paper tray – if it got ink, erase them immediately. Also wipe off any ink that got on the inner part of the disk reserved for recording.
If you need to print a large number of disks, first make some test discs to check the quality of the printed surface. In a day when the disc surface has dried, you can start printing. Do not use discs after printing, do not touch the surface until it dries. It is impossible to dry the disks under direct sunlight. If after drying the surface remained sticky, so the colors too saturated. Open the software to print on discs and lower the saturation of the colors in the settings.
