You will need
- Adobe Photoshop
Instruction
1
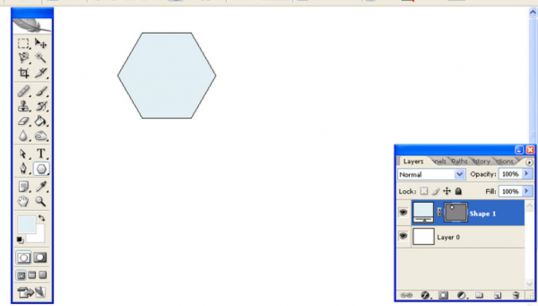
Open a new document. On the toolbar, select the Polygon Tool. On the property bar, set sides=6 and any color to suit your taste. Hold down the Shift key, draw a hexagon. Hover over a shape, click the right mouse button and click Rasterize Layer.
2
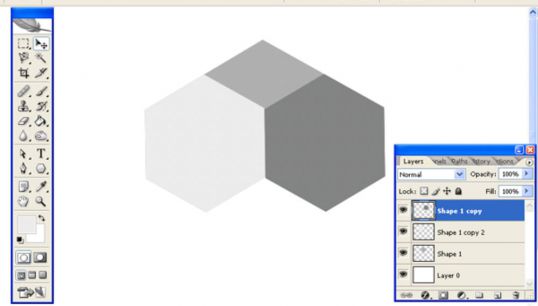
Double-copy this layer (Ctrl+J) so you've got three of the hexagon. Stand on a new layer. Hold down Ctrl, click the icon with the image of a new figure to get selection. On the Toolbox, set the foreground color a darker shade. Using the Paint Bucket tool fill the hexagon. Again, go to new layer and fill the shape with a suitable shade. Thus, your hexagons are painted in different shades of one color.
3
Using the Move tool to position the hexagons as shown in the figure. In this case, consider where in your picture will be located light source. There, where the light needs to be brighter face. The dark face in the shadows.
4
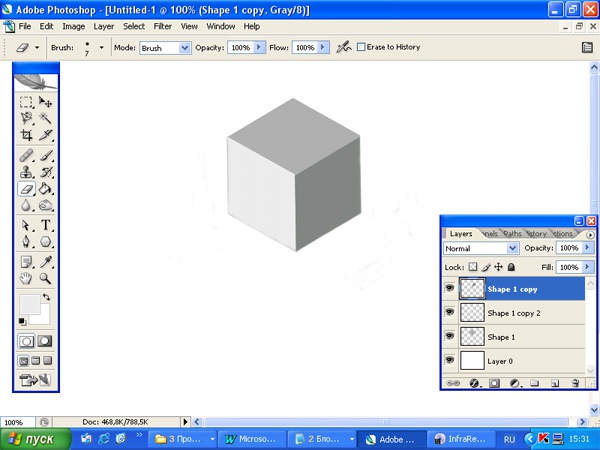
For layers with the hexagons, which represent the side faces, set the Opacity=50%. On the toolbar, choose the Eraser Tool. Set hardness=100% and begin carefully erasing the excess image. In order to remove the unwanted color is near the edge, you should do the following: reduce the diameter of the gum, in order not to capture extra. Move the cursor one end of edges of the hexagonand click the left mouse button. Then move the cursor to the other end, press the Shift key and again click the left key. You get a flat empty strip. Repeat this procedure as many times as it takes to remove the unwanted background around the figure.
5
For layers with side return Opacity=100%.


