Instruction
1
Do not convert or save the pictures to JPEG – this format does not provide sufficient compression, and you can get a small photo of poor quality and large size. Convert the original photos to TIFF or PSD, if your camera shoots in RAW. If you have a simple camera, shooting directly to JPEG, save all photos as TIFF or PSD.
2
Open the photo in Photoshop and perform retouching and color correction, correct the white balance, and if necessary, adjust the brightness and contrast, eliminate noise defects. Preparing a photo to slimming, save the original in a separate folder and work from the copy.
3
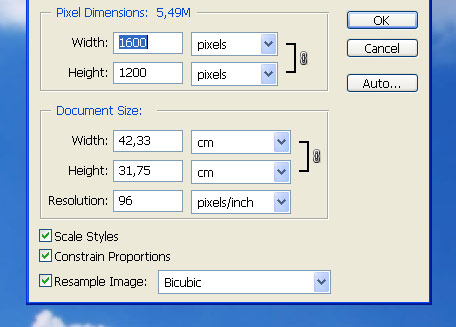
To begin, open the Image menu and under Image Size select the desired size pictures. Find in this section the block Pixel Dimensions and if your picture has a horizontal orientation, set the width to 800 pixels, and frames for vertical orientation, set the height to 800 pixels. Make sure that the scale of the photographs is equal to 100% and click Filter.
4
Section select Sharpen>Smart Sharpen and apply a filter to photos, setting the following options in its settings: Amount: 300, Radius: 0.2, or Amount: 100, Radius: 0.3. Watch for any changes in the pictures in the preview window. After getting the result you want, save the image.
5
There is a more complex method of reducing photos without losing quality, in which the processing of the photos to start with converting it to Lab. To do this, open the Image menu and select Mode>Lab Color.
6
Then go to Image Size and the block Pixel Dimensions set to horizontal photos width of 3200 pixels and a vertical height of 2,400 pixels. Scale image reduce to 50%, and the palette channels (Channels select Lightness.
7
After that, open the filter menu and choose Sharpen>Unsharp Mask with the following settings: Amount: 150-300mm, Radius: 0.8-2,0, Threshold: 15-30. Check whether the increased image noise. Open again the Image section Size and set the width value to 50%, then return the real pictures and in the palette view, select, as in the previous case, the Lightness channel.
8
Open the filter menu again and select Unsharp Mask by setting all values to 50% of previous values. To channel And apply the Blur filter, and then the same filter will apply to channel B. Then go to Image and select Mode>RGB Color. Convert the photo back to RGB, save it.