You will need
- computer;
- microphone;
- a beginner PC user.
Instruction
1
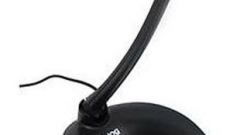
It should be noted that the microphones may be different in form: pop that often sing karaoke, office (usually on a thin stalk) and built into the body of laptops and netbooks. Also, there are microphones, combined headphone.
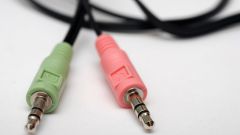
After connecting the microphone to the corresponding 3.5 mm Jack on the PC case (if the plug is wider than the microphone, use the adapter) reboot the computer. If your computer is stationary and represents the system unit, turn on the microphone in connector on the rear panel, even if the same connector is found on the front of the system unit.
After connecting the microphone to the corresponding 3.5 mm Jack on the PC case (if the plug is wider than the microphone, use the adapter) reboot the computer. If your computer is stationary and represents the system unit, turn on the microphone in connector on the rear panel, even if the same connector is found on the front of the system unit.
2
After you restart the computer and start Windows, go to start - control Panel, select small or large icons, and double-click on the label "Sound".
In the opened window select the tab "Recording". You will see the name of the microphone and a tick means that the equipment has been successfully installed. Try to say something into the microphone. On the EQ there will be a signal increasing sound. If not, you may have a microphone attached, but included. Locate the microphone button and press it. Usually, this button is microphones the pop type.
In the opened window select the tab "Recording". You will see the name of the microphone and a tick means that the equipment has been successfully installed. Try to say something into the microphone. On the EQ there will be a signal increasing sound. If not, you may have a microphone attached, but included. Locate the microphone button and press it. Usually, this button is microphones the pop type.
3
Now for the microphone setting on the computer. All the same, select the microphone and click "Properties". In the tab "Listen", you can set the checkmark. After that all the sound from the microphone will instantly be fed to the speakers.
In the "Levels" tab you can adjust the volume of microphone and sound amplification with the help of sliders.
In the tab "Improvement" can include such options as "noise Suppression" and "Suppress echo". Remember that when talking in Skype these options can degrade hearing.
In the Advanced tab you can set the frequency of the sound, if you are going to record something using the microphone on the computer.
Note
How to set microphone on Windows 7. Before you start to configure the microphone, do make sure that your computer has a sound driver. For this you need to go to device Manager and note the item sound video and game controllers
Useful advice
How to configure the microphone. After we hooked up the microphone, click "start", choose "settings" and "control Panel". In the appeared control Panel, open "Sounds and audio devices". Appears the program "Sounds and audio devices" without touching anything else, press the tab "Speech".


