Instruction
1
If your computer's operating system is Windows XP (or earlier), open any Windows Explorer window. This may be a window "My computer" or any folder, for example.
2
In the menu select "tools" and then click "folder options". So you will get access to the system settings, which can include some kind of display of files and folders on your computer.
3
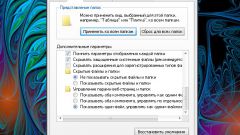
In before you opened the dialog box, click the tab "View" and then select the check box next to the system with the command "Show hidden files and folders". After that, click "OK" to apply the changes. From this moment all the invisible folders will be displayed along with the others.
4
If the computer is running Windows version Vista or 7, but the steps will be different. Open any Explorer window, on the toolbar, click "Organize" and select the context menu item "folder Options and search". Next, follow the steps described in the previous step.
5
By enabling the display hidden items, you can go to the search folder that was previously hidden. If the folder is known, for example, on the desktop, just carefully review the contents of this field.
6
If the exact location of the folder you do not know, do a search. To do this, click "start" and if you're using Windows 7 or Vista, type in the search bar the name of the folder, or at least part of it. If your operating system version XP (or earlier), go to "Search" by opening the "start menu" and enter the name of the desired folder in the corresponding field.
7
Once you get the search results, select your folder. Please note that its appearance (and content too) is a bit fuzzy – so look all the hidden items in Windows.
Note
You can change the hidden attribute of the folder to make it look like a normal. To do this, click the right mouse button on the folder icon and select the menu "Properties". Uncheck the item "Hidden" on the "General" tab, under "Attributes" and click "OK".

