Instruction
1
The receiver can connect using USB or Bluetooth port. In the first case you just insert the cable into the appropriate connector, and the computer detects the device. If it does not, you may need to install the drivers for this model of receiver. You can find them on the manufacturer's website or install the ones that came in the package Navigator.
2
To connect the device via the wireless port, start the operation of the receiver. Then turn on the Bluetooth on the laptop by pressing the key combination specified in the instructions to the computer (usually a combination key with Fn). To find a Navigator control panel go to the folder "Bluetooth Devices", click on the "Add" button. In the list that appears, select your device and start the configuration wizard.
3
To transfer data from receiver to computer, you need a separate virtual port. His number you can find the manuals Navigator or to determine using special program. On the software CD for the Navigator, find the application called GPS Information. In the window that opens click on the Scan COM ports – so you start scanning the available COM ports. Copy the found number.
4
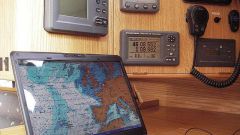
Install on a laptop navigation program. Choice depends on in what conditions and for what purposes you will use the equipment. Some programs are based on scanned maps, they are very detailed and precise – perfect for Hiking. E cards less, "weigh", and therefore not slow down the performance of the Navigator. They are convenient for use on the roads. On these maps you can plot a route based on traffic information. In the settings of the selected program, enter the number found for the virtual port.
5
While scanning COM ports you can inspect the Navigator. Click on the Start GPS in the bottom window, you should see the numbers – Navigator starts the connection with the satellites and determining your location. To continue the navigation settings, disable running check.