You will need
- - satellite antenna;
- - satellite receiver;
- - coaxial cable;
- F-connectors;
- TV
Instruction
1
Install and configure a satellite antenna. This can be done with the help of the compass by azimuth or the sun. The latter a more viable option.
2
Disconnect the socket of the satellite receiver from the network 220 V. This is mandatory, otherwise you can damage the device. Strip the ends of the coaxial cable and install the F-connectors. Keep the screen did not touch the Central core. Connect your satellite antenna to satellite receiver (tuner ) in connector LBN IN.
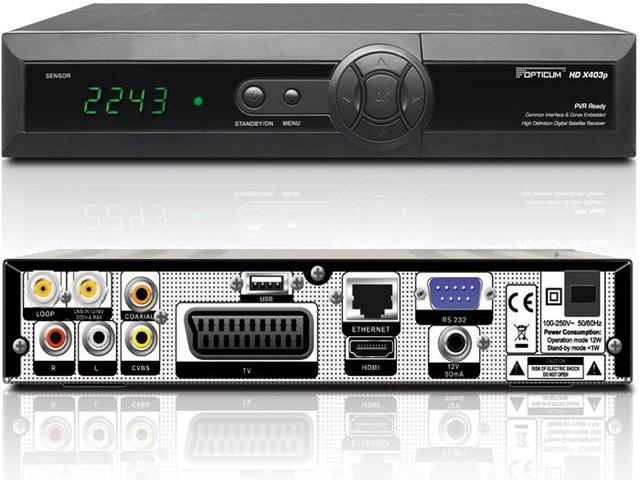
3
Connect the receiver to the TV. On its rear panel is a set of connectors – scart, tulips, HDMI and the antenna output. The connection guide is available in. Then on the TV, select any channel, it will show a satellite receiver. Turn on the tuner, its display should glow, not hours and any number. Select "channel Search" and set the TV to the receiver in manual mode. After that, the satellite will only switch the remote receiver.
4
Turn on the tuner or remote control MENU button, then select "Antenna" or "setup" or "Setup-search channels" or "channel Search". Enter the menu to configure the LNB, DiSEqC, positioner, 0/12V, tone flash.
5
Make sure in the menu of the tuner to the required satellite. If it is missing, enter it manually. Check the adjustment of the satellite head: linear universal LNB (9750/10600 frequency), circular - circular LNB (10750 frequency), band - C-band LNB frequency 5150). These technical data is written on satellite Converter (head). Select the desired satellite and adjust the DiSEqC port for it. Common option – 4 port. If you have one Converter, then install none.
6
Note when connecting satellite Converter to the DiSEqC switch which inputs are connected to each of the converters. Menu tuner set ports DiSEqC switch relative to the satellite heads. For example, to configure the channels from the satellite Amos 4w set in menu options – the satellite Amos 4w and DiSEqC port – 1/4 (or A). Scan it. If the result is negative, then put in your next port, etc. After setting, proceed to installing the next satellite that is configured on a satellite dish antenna. Check position: the positioner is off, 0/12V – off, flash tone – off, LNB power – on the DiSEqC Protocol is to set the desired switch, DiSEqC port – set match.
7
Add the desired channel on the satellite receiver. To do this, to scan a specific transponder on the desired satellite. Find the settings on the site www.flysat.com. In order to scan the transponder, go to the menu of the satellite receiver to the appropriate section. Select, if not then add manually. Click the button on the remote tuner to scan, it is possible to define the colour prompts at the bottom of the TV screen.
8
Select manual or automatic scanning. In the latter case, the tuner will determine a working transponders, which are written in it, and will return a list of channels. Due to the fact that the position of the satellite changes constantly follow emerging fresh data. If the settings are incorrect, the screen will remain black.
9
Create a list of the most viewed channels. To do this through the menu of the satellite receiver label favorite channel and specify in which category to save it. Select in the menu edit channel – TV channel. Traditionally these actions are performed using the white button.
Useful advice
Spend 2 times a month in the satellite receiver auto scan your configured satellites.