You will need
- - PC with Windows operating system;
- iPad;
- - USB cable connecting the iPad to your PC.
Instruction
1
Prepare photos to export from PC to iPad. Define all the images you plan to transfer to a tablet computer. Create on a personal computer directory, and then copy the folder with the selected photos.
2
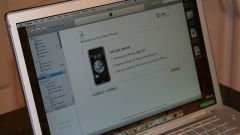
Connect to your personal computer or iPad using USB connection. Run on a tablet computer, iTunes, which manages the multimedia content.
3
Activate the tab "Photos" related to your device. Go to a directory with images prepared for export to iPad. Select and check the folder and the individual photos you choose to download to a tablet computer. If you want to transfer to iPad directory as a whole, identify all of its elements.
4
Click on the "Apply" and copy all the selected images from your personal computer to iPad. If you need to download to your tablet computer for more photos and images, you can at any time add the necessary files using exactly the same method.
5
Get rid of unnecessary images and free on the tablet computer space for new photos. Connect iPad with computer using USB cable and launch iTunes. Tab photos, select the checkboxes of unnecessary folders or individual pictures and click on "Remove".
6
Use any file Manager or Windows Explorer, which is included in the standard set of Windows operating system and remove the iPad from the screenshots that appeared in the Photos app. Activate the application "Photo" and click on the button in the upper right corner of the window. Select some photos and screenshots taken by the device itself and select "Remove".
Note
When you copy photos to a tablet computer using iTunes the image size is adapted to the device screen. The original picture is not saved.
Useful advice
To control the amount of space in the iPad that takes photos, you can use the program's interface is iTunes.


