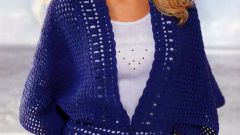
You will need
- yarn;
- - the spokes;
- - pattern.
Instruction
1
When performing products with a sleeve "a Raglan" control loops can be performed at the beginning and end of the front row. When you have reached the armhole of the sleeve, take away the beginning and the end of the first series of 3 loops. The first even number, perform the binding scheme. Further provarite viscous purl 2 stitches at beginning and 2 stitches at the end of each odd number (3, 5, 7, 9, etc. series). At the beginning and at the end of the even rows (4, 6, 8, etc. series) will have 2 loops garter viscous. Provarite in the odd rows of these 2 loops together purl knit. Take control of the pattern, and get a nice bevel detail sweaters in tracks of the front loops.
2
When performing classical openings, the decrease of the loops is held at the beginning of the obverse and beginning of reverse range. Close the first 3 loops of the front row. For the first 2 loops provarite along the front binding and the loop on the left needle. Again provarite 2 loops front: take one loop already thrown. and and following it. A loop again loop to left needle. Last time provarite 2 loops along the front and continue knitting to end of row scheme. On the wrong side, close in front of the row of 3 loops just like in the beginning of the previous row, but promazyvaya loops purl knit. Continue knitting in pattern to end of row. In the beginning of the second front and rear rows of openings only take 2 hinges and 3 row – only one loop.
3
It is possible to diminish the loop for armhole at the beginning and at the end of a series. To do this, close first 3 loops and continue knitting according to the scheme. Leave the last 4 loops of a number of nepovezane and transfer them on right needle. Pull the first second from the end of the loop through the last loop. Then again, second from the end of row pull through the last loop. Repeat pulling until there is one loop. Provarite her face. Turn the item over and do the purl row. The decrease of the loops in successive rows will be similar, but then close 2 loops, and then 1 loop.
Note
Follow up picture when you decrease the hinge openings.
Useful advice
Before starting, prepare the pattern parts of the shirt. It will tie the product without distortion.

