You will need
- Screwdriver, pliers, a new meter, two-pole machine or a batch switch.
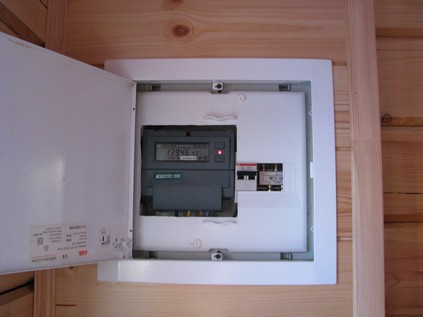
Instruction
1
Fix new meter to the panel.
2
Connect the wires on the second and fourth terminals according to their numbers.
3
Connect the number three to the third terminal.
4
To the first terminal, connect the last wire.
5
Tighten the tension screw.
6
Turn on the bipolar automatic or burst switch.
7
Check the circuit connection. If done correctly, the led will show the phase in the first and second terminals.
8
If the indicator shows a phase at the third and fourth terminals, the previous meter was incorrectly connected. In this case, do the following:a) again disconnect the two-pole machine or packet switch;b) check the indicator to no voltage on the terminals;C) reverse the leads of the third and first terminals;g) reverse the leads of the fourth and second terminals;d) enable two-pole machine or a packet switch; (e) recheck the wiring.
9
Turn on the machines and twist the tube.
10
Check that the meter was working properly: when turn on home appliances view, does the meter disk or the like occurs flickering of the indicator of the electronic counter. If the counter induction and the disc rotates in the opposite direction (right to left) to bring it into working condition, you need to:a) complete the desired trip, as described above, check the voltage and change the wires first and second terminals;b) enable the meter, recheck the diagram and the direction of rotation of the disk.
11
Install the lid clamp on the electric meter.
12
Call a representative organization of the electricity supplier to seal the meter and place it as a settlement.
Note
At run time, connect the meter need to be extremely cautious and observe safety to avoid the infliction of harm to health and damage counter.